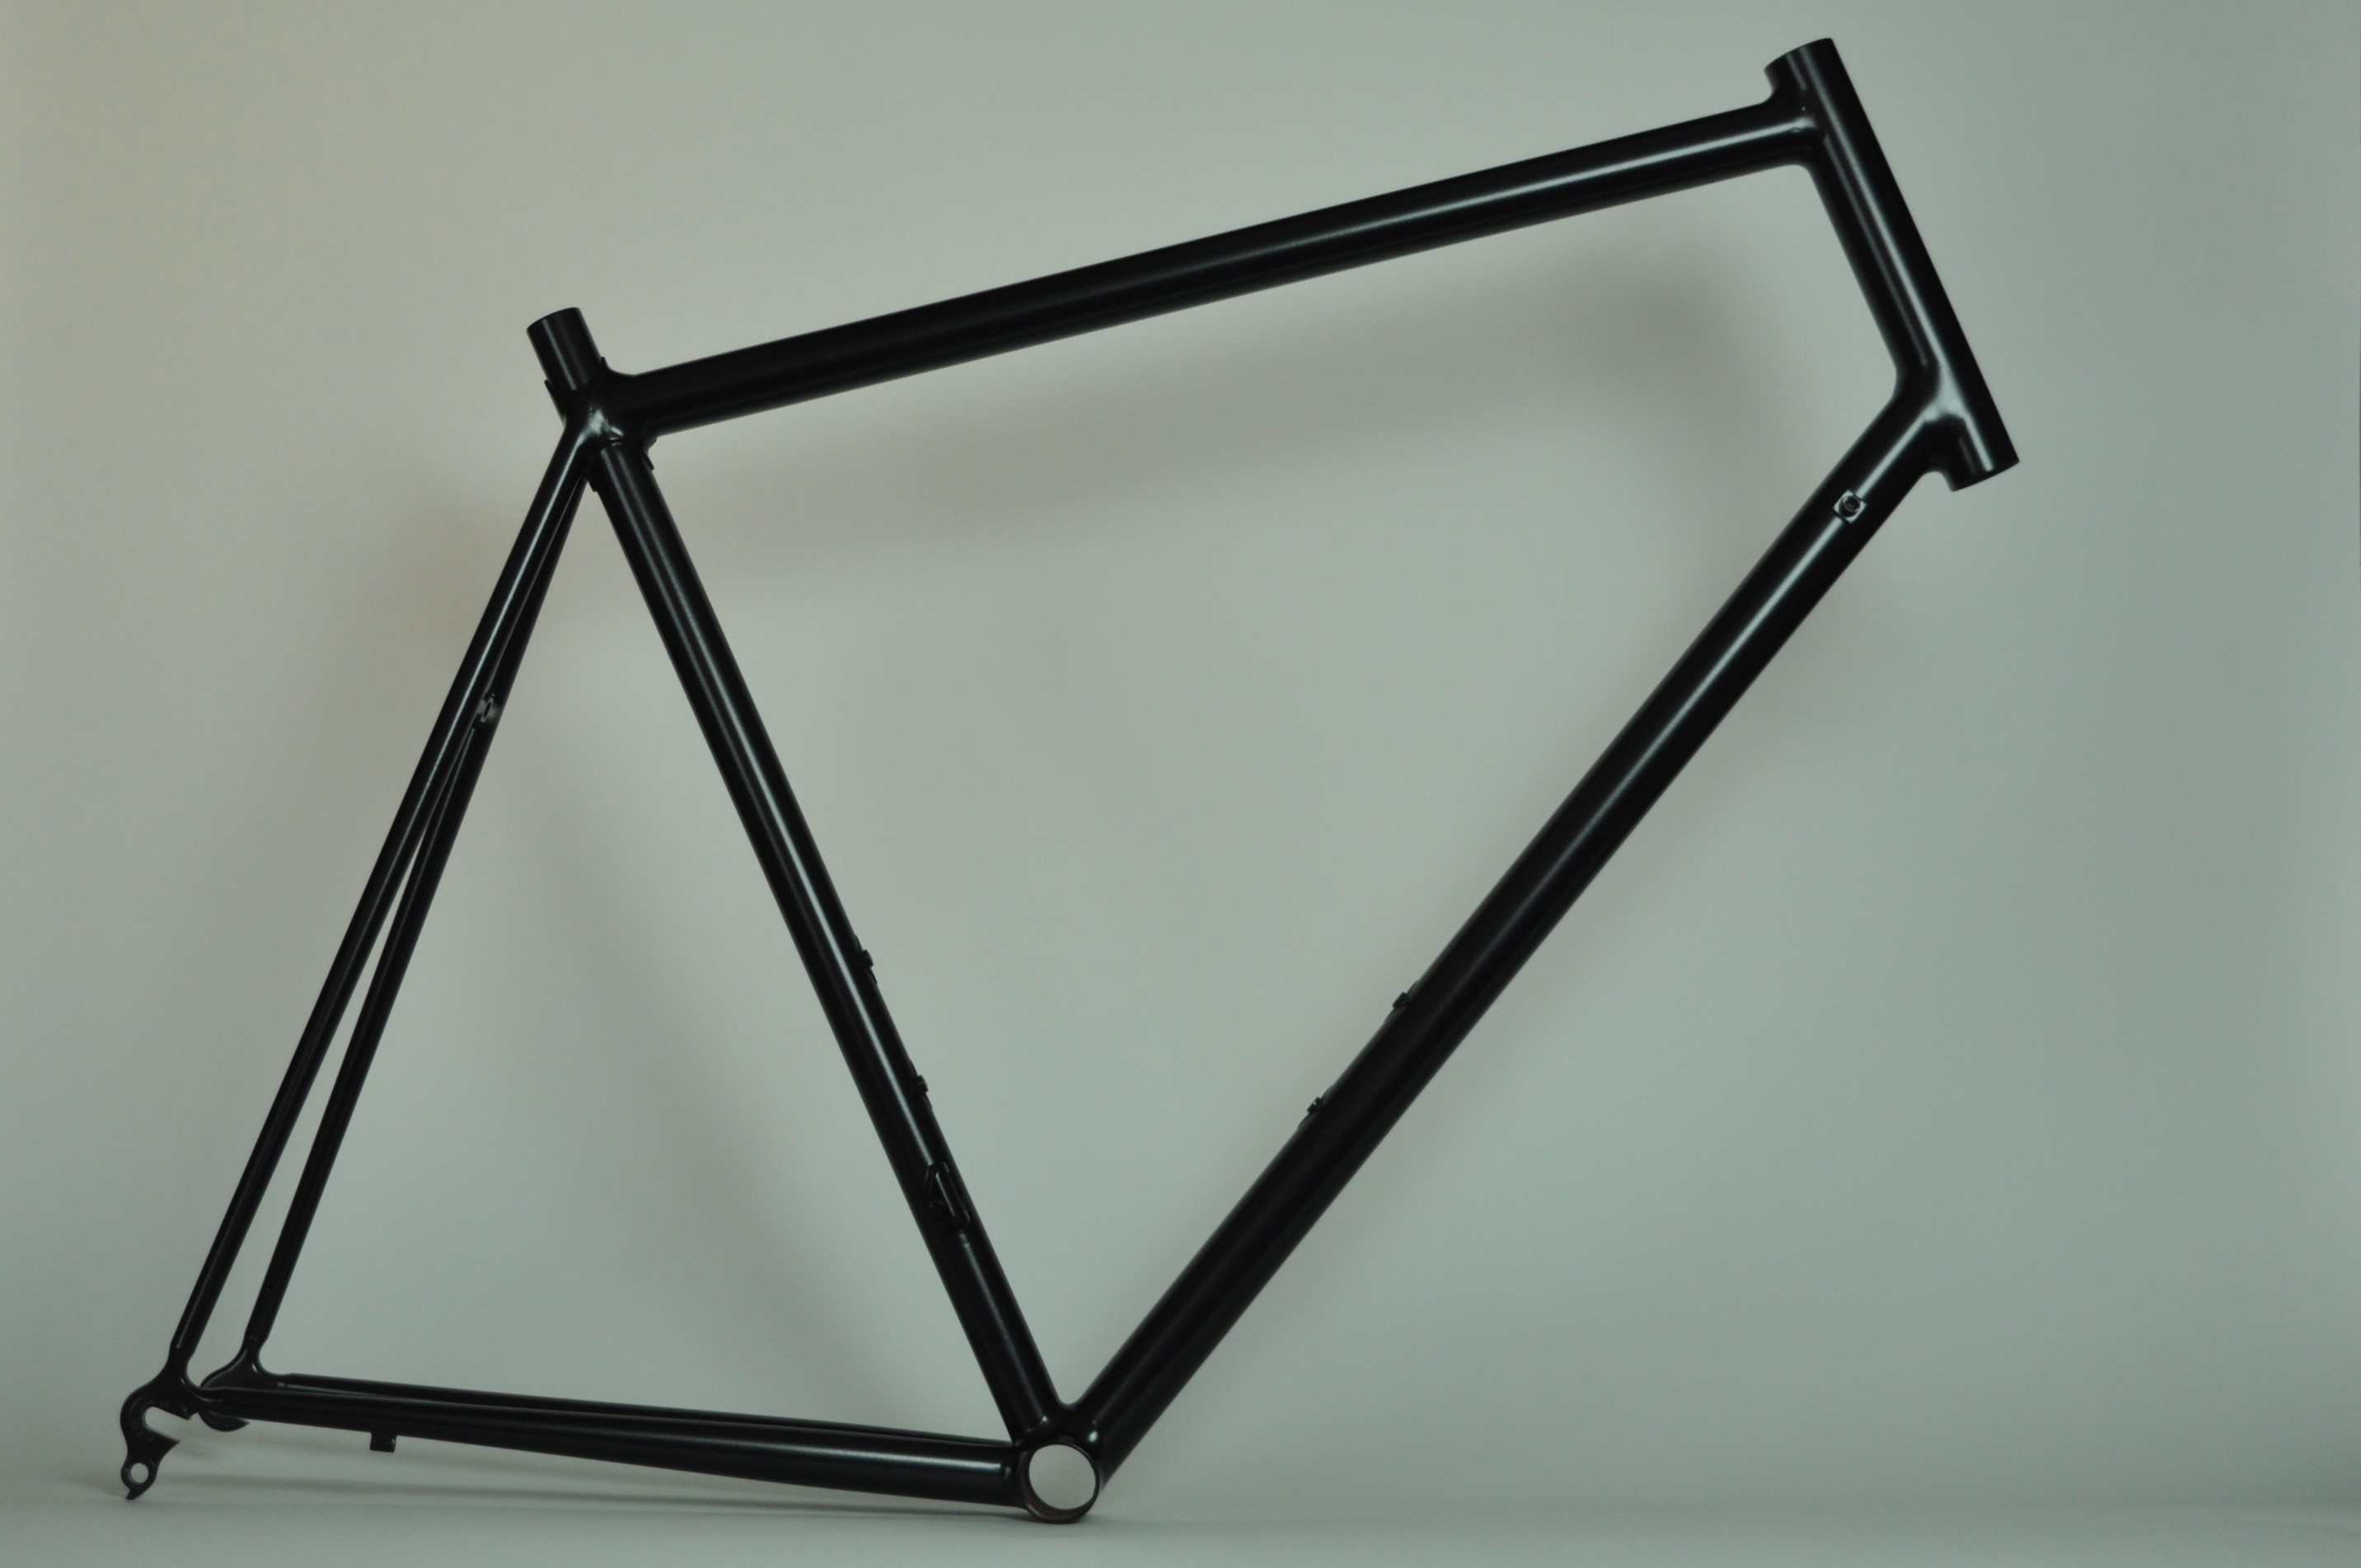
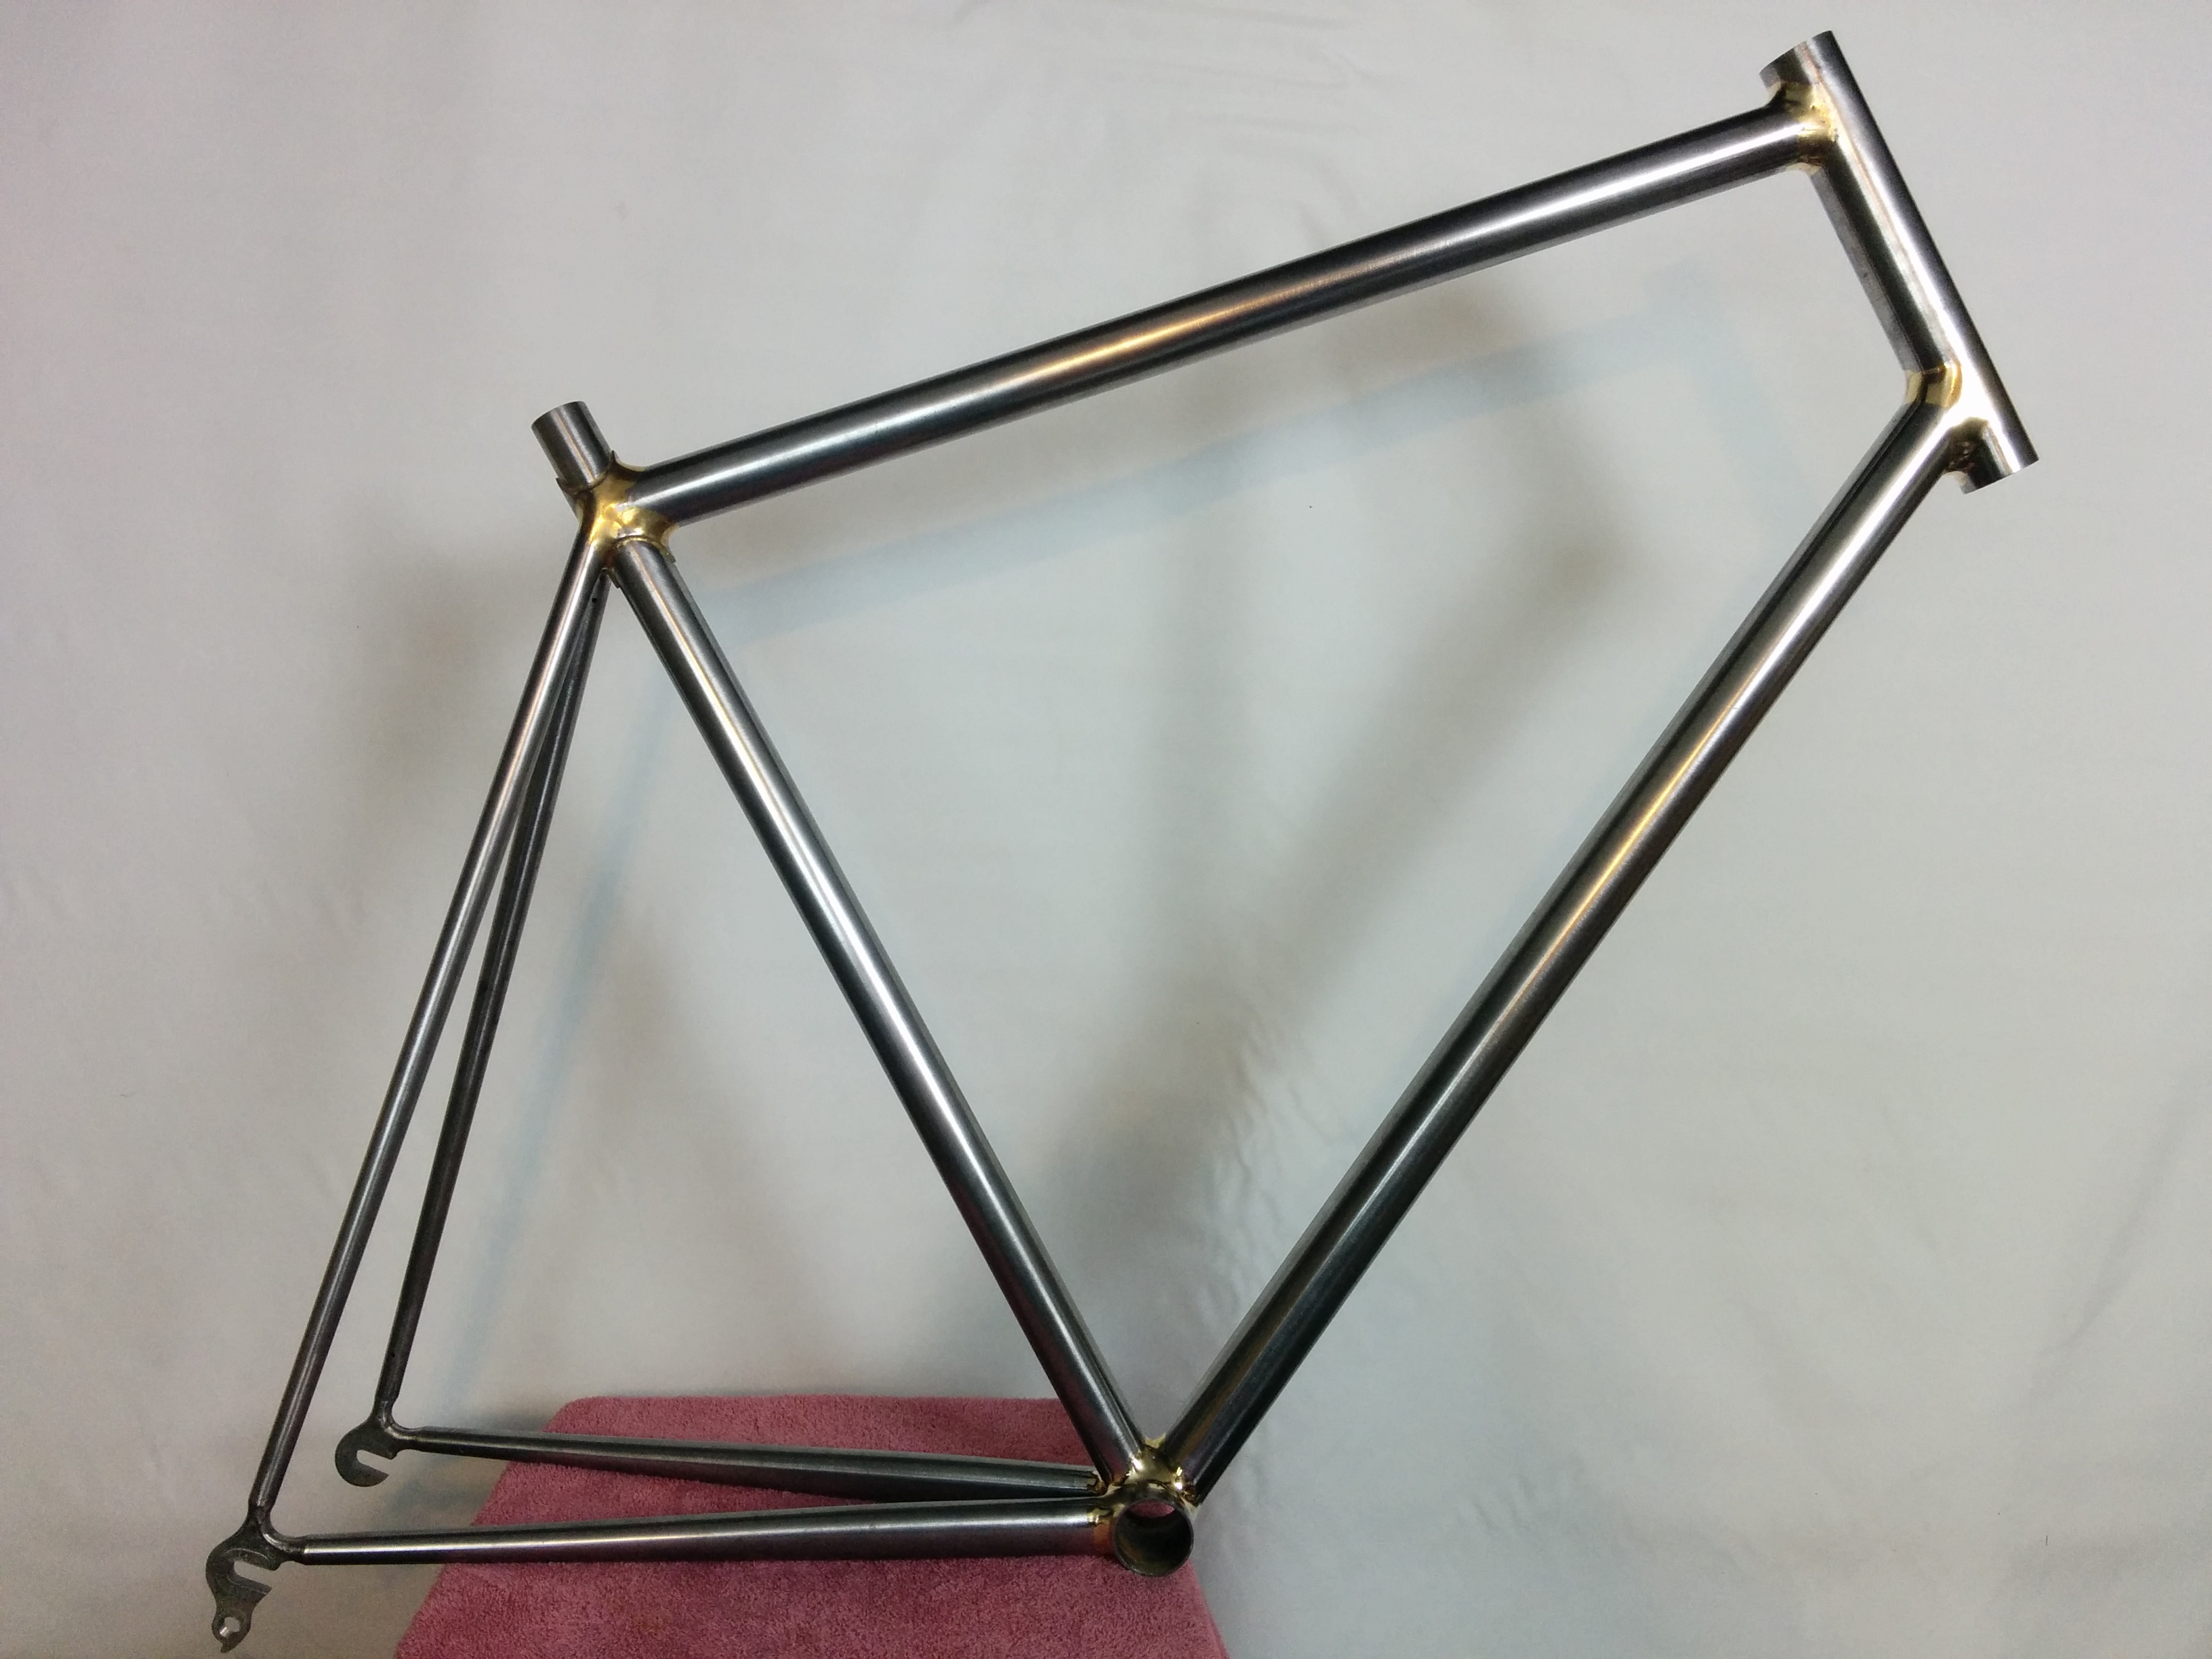
My second hand made bicycle frame is done, aside from brazing on the various fittings for brakes and gears. Saying it’s a long project is an understatement. I began ordering parts and tubing just after my 50th birthday almost 4 years ago. Starting a new career the same time I began planning the bike definitely hurt my building pace, but fear was actually the bigger factor in the delay.
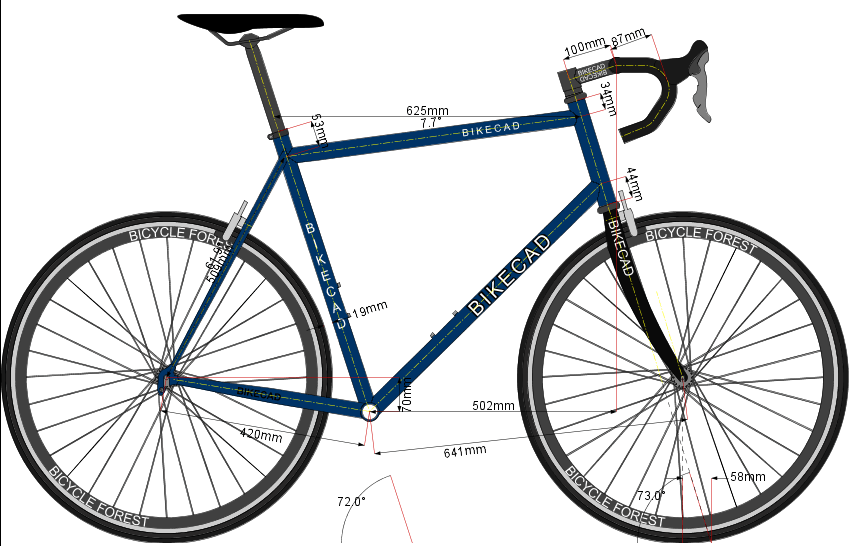
Designing a frame is easy with CAD programs like Bike CAD. However, the dimensions and angles chosen are really important for ride and handling so I used numbers that mirror those of high performance bicycles available today. I’m not trying to reinvent the wheel or experiment. I just want a nice bike.
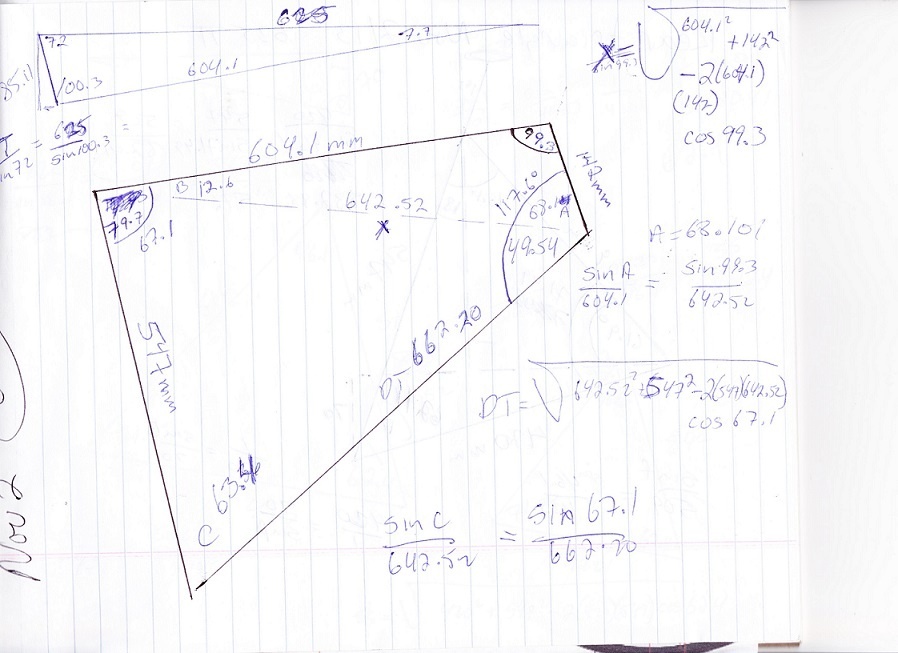
The free design software that I used doesn’t provide all of the dimensions for building the frame, so a refresher course in trigonometry is mandatory if you are as rusty as I was when I built frame # 1. The trig is needed to figure out the angles the various tubes meet at and their lengths.
Choosing the right tubing really matters. Lightness is very important but comes at the expense of both money and work-ability. The more expensive stuff is as thin as 0.4 mm in places and super strong, but unforgiving of poor technique in building. Tubing diameters affect the flexibility of the frame with larger diameters being stiffer than smaller ones. Smaller frames are stiffer than bigger frames if built with the same tubing choices. I’m tall but skinny at 180 pounds and get away with tubing diameters that wouldn’t work for a 240 pound man of the same height.


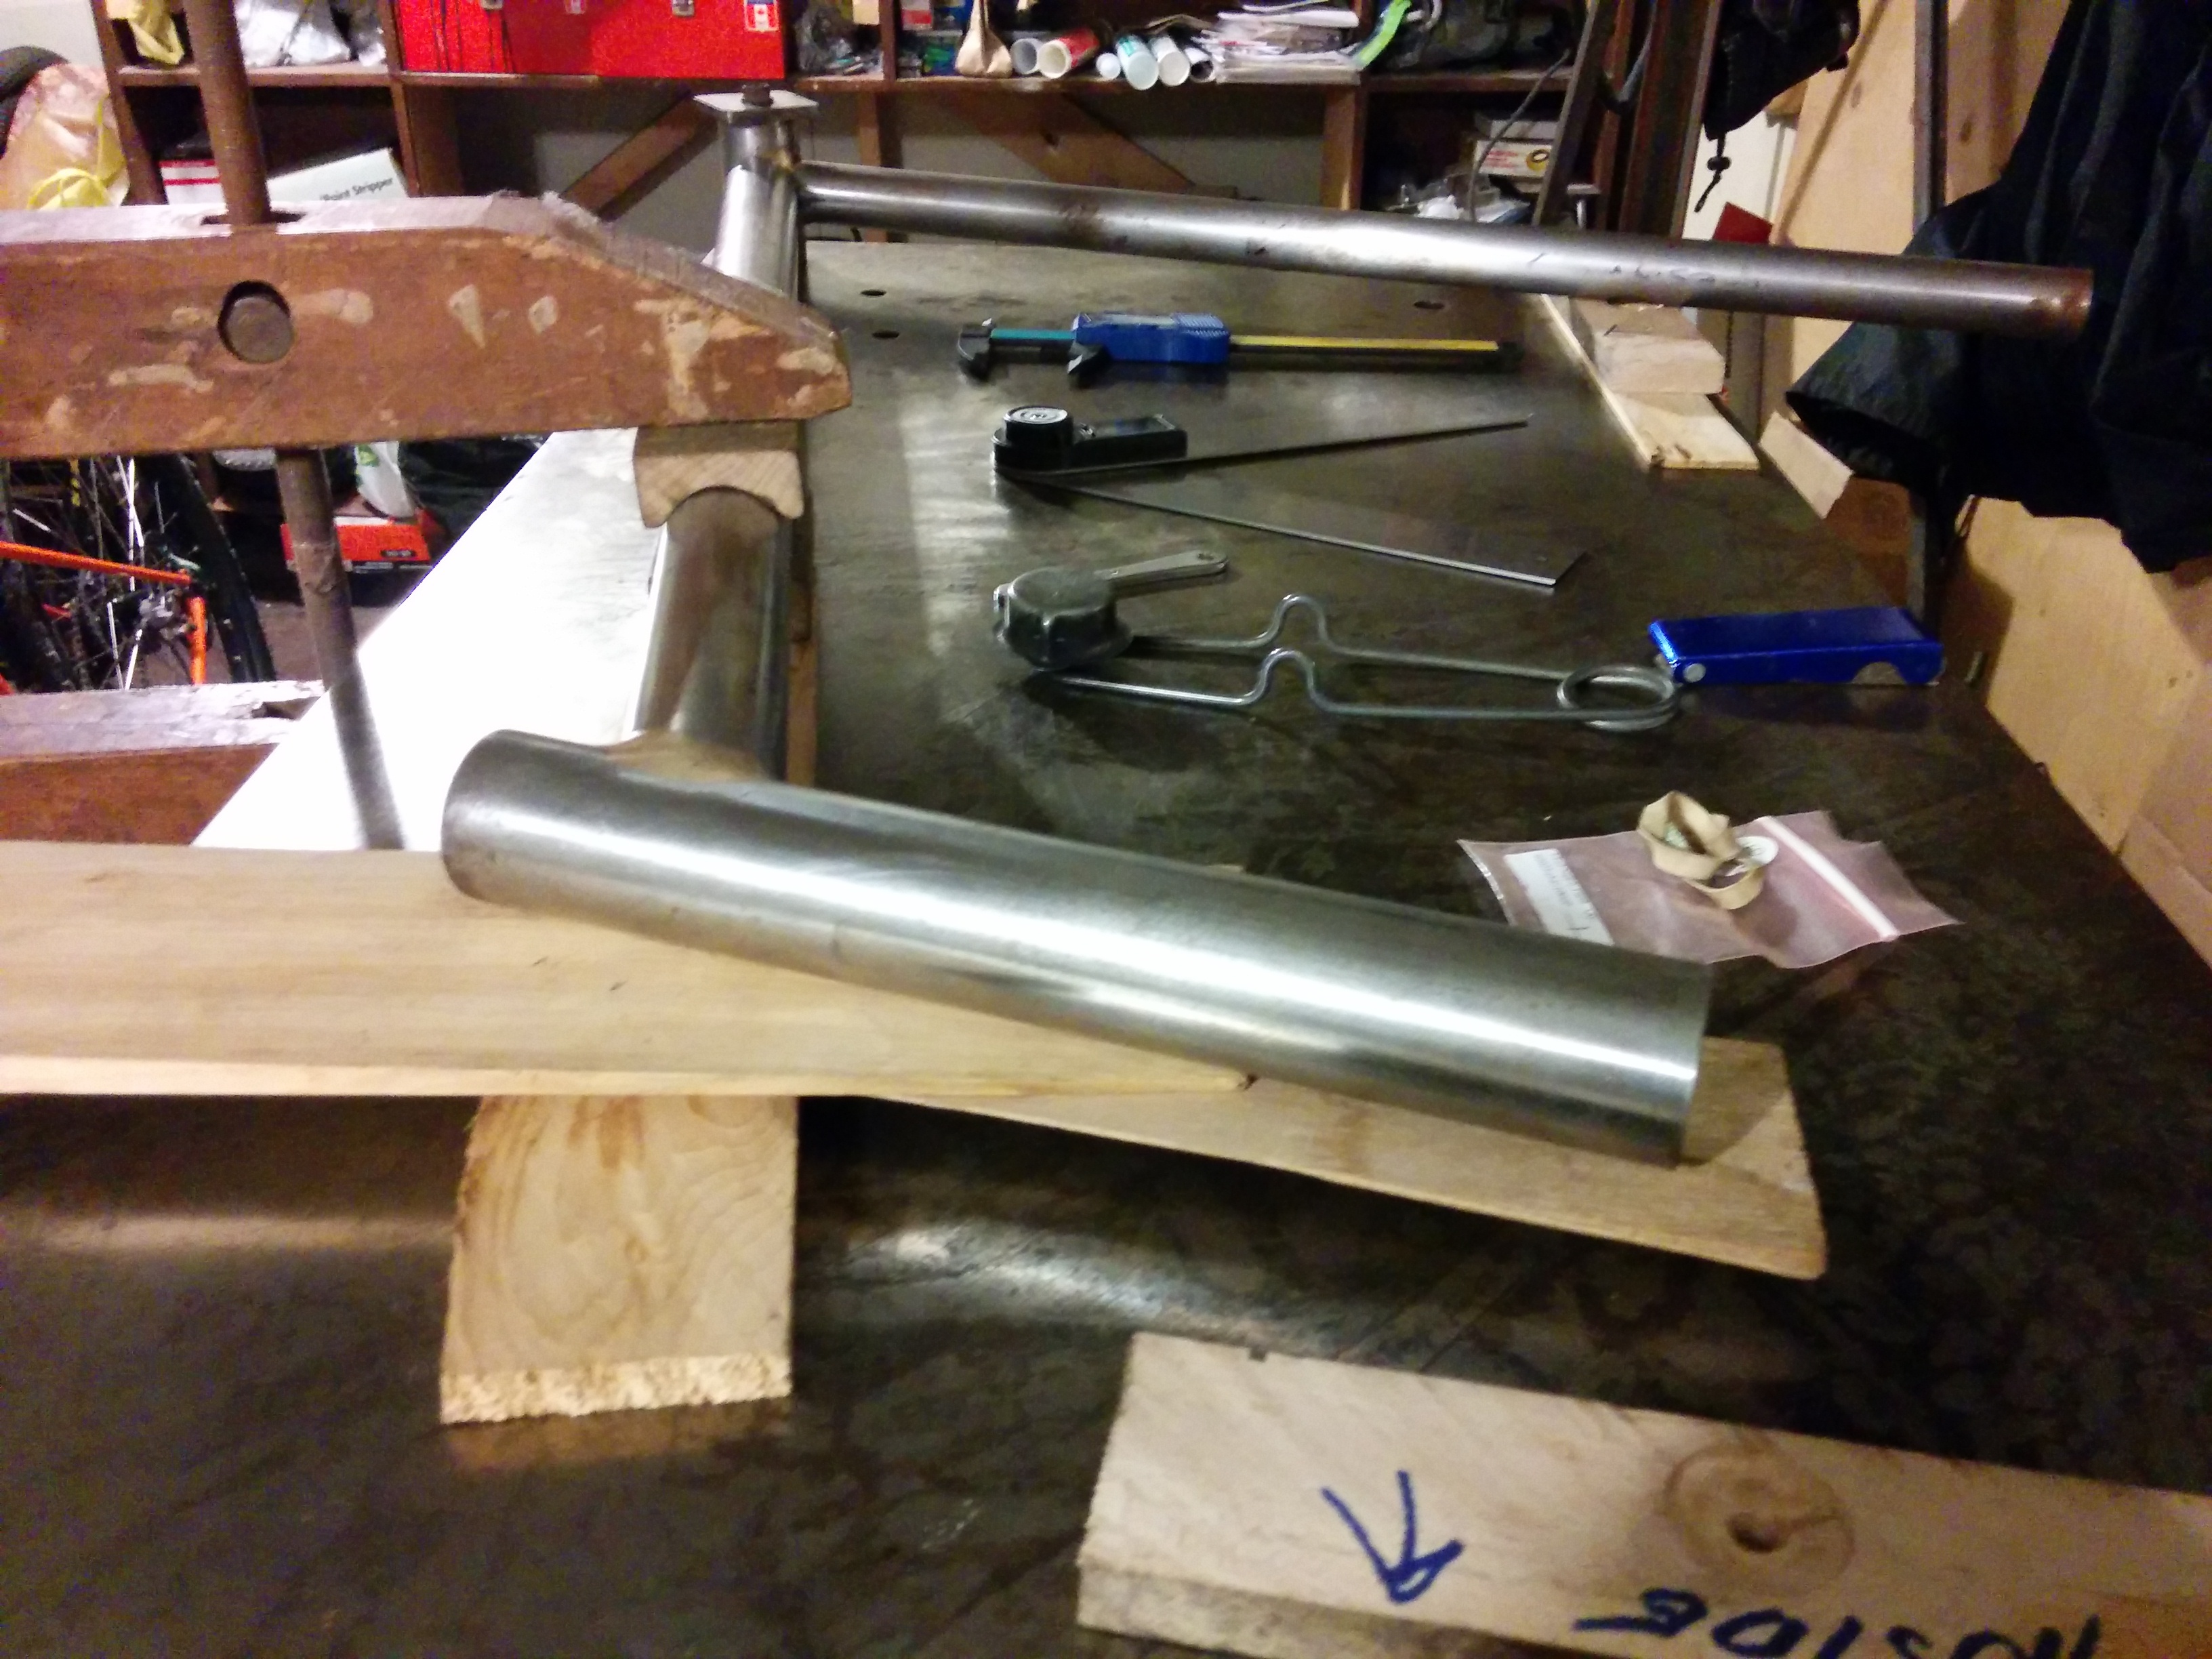


I ordered tubing from Henry James, and then did nothing with the tubing for months as I was busy with school, family and work. Eventually I got to work and started on the first joint between the bottom bracket shell and the seat tube.
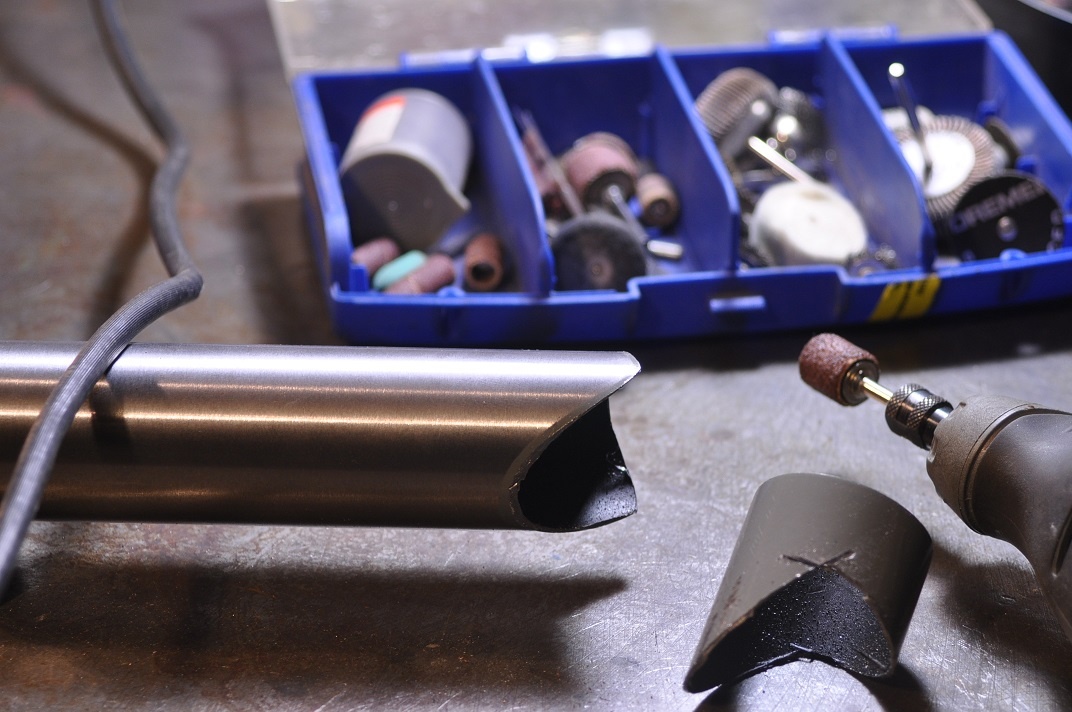
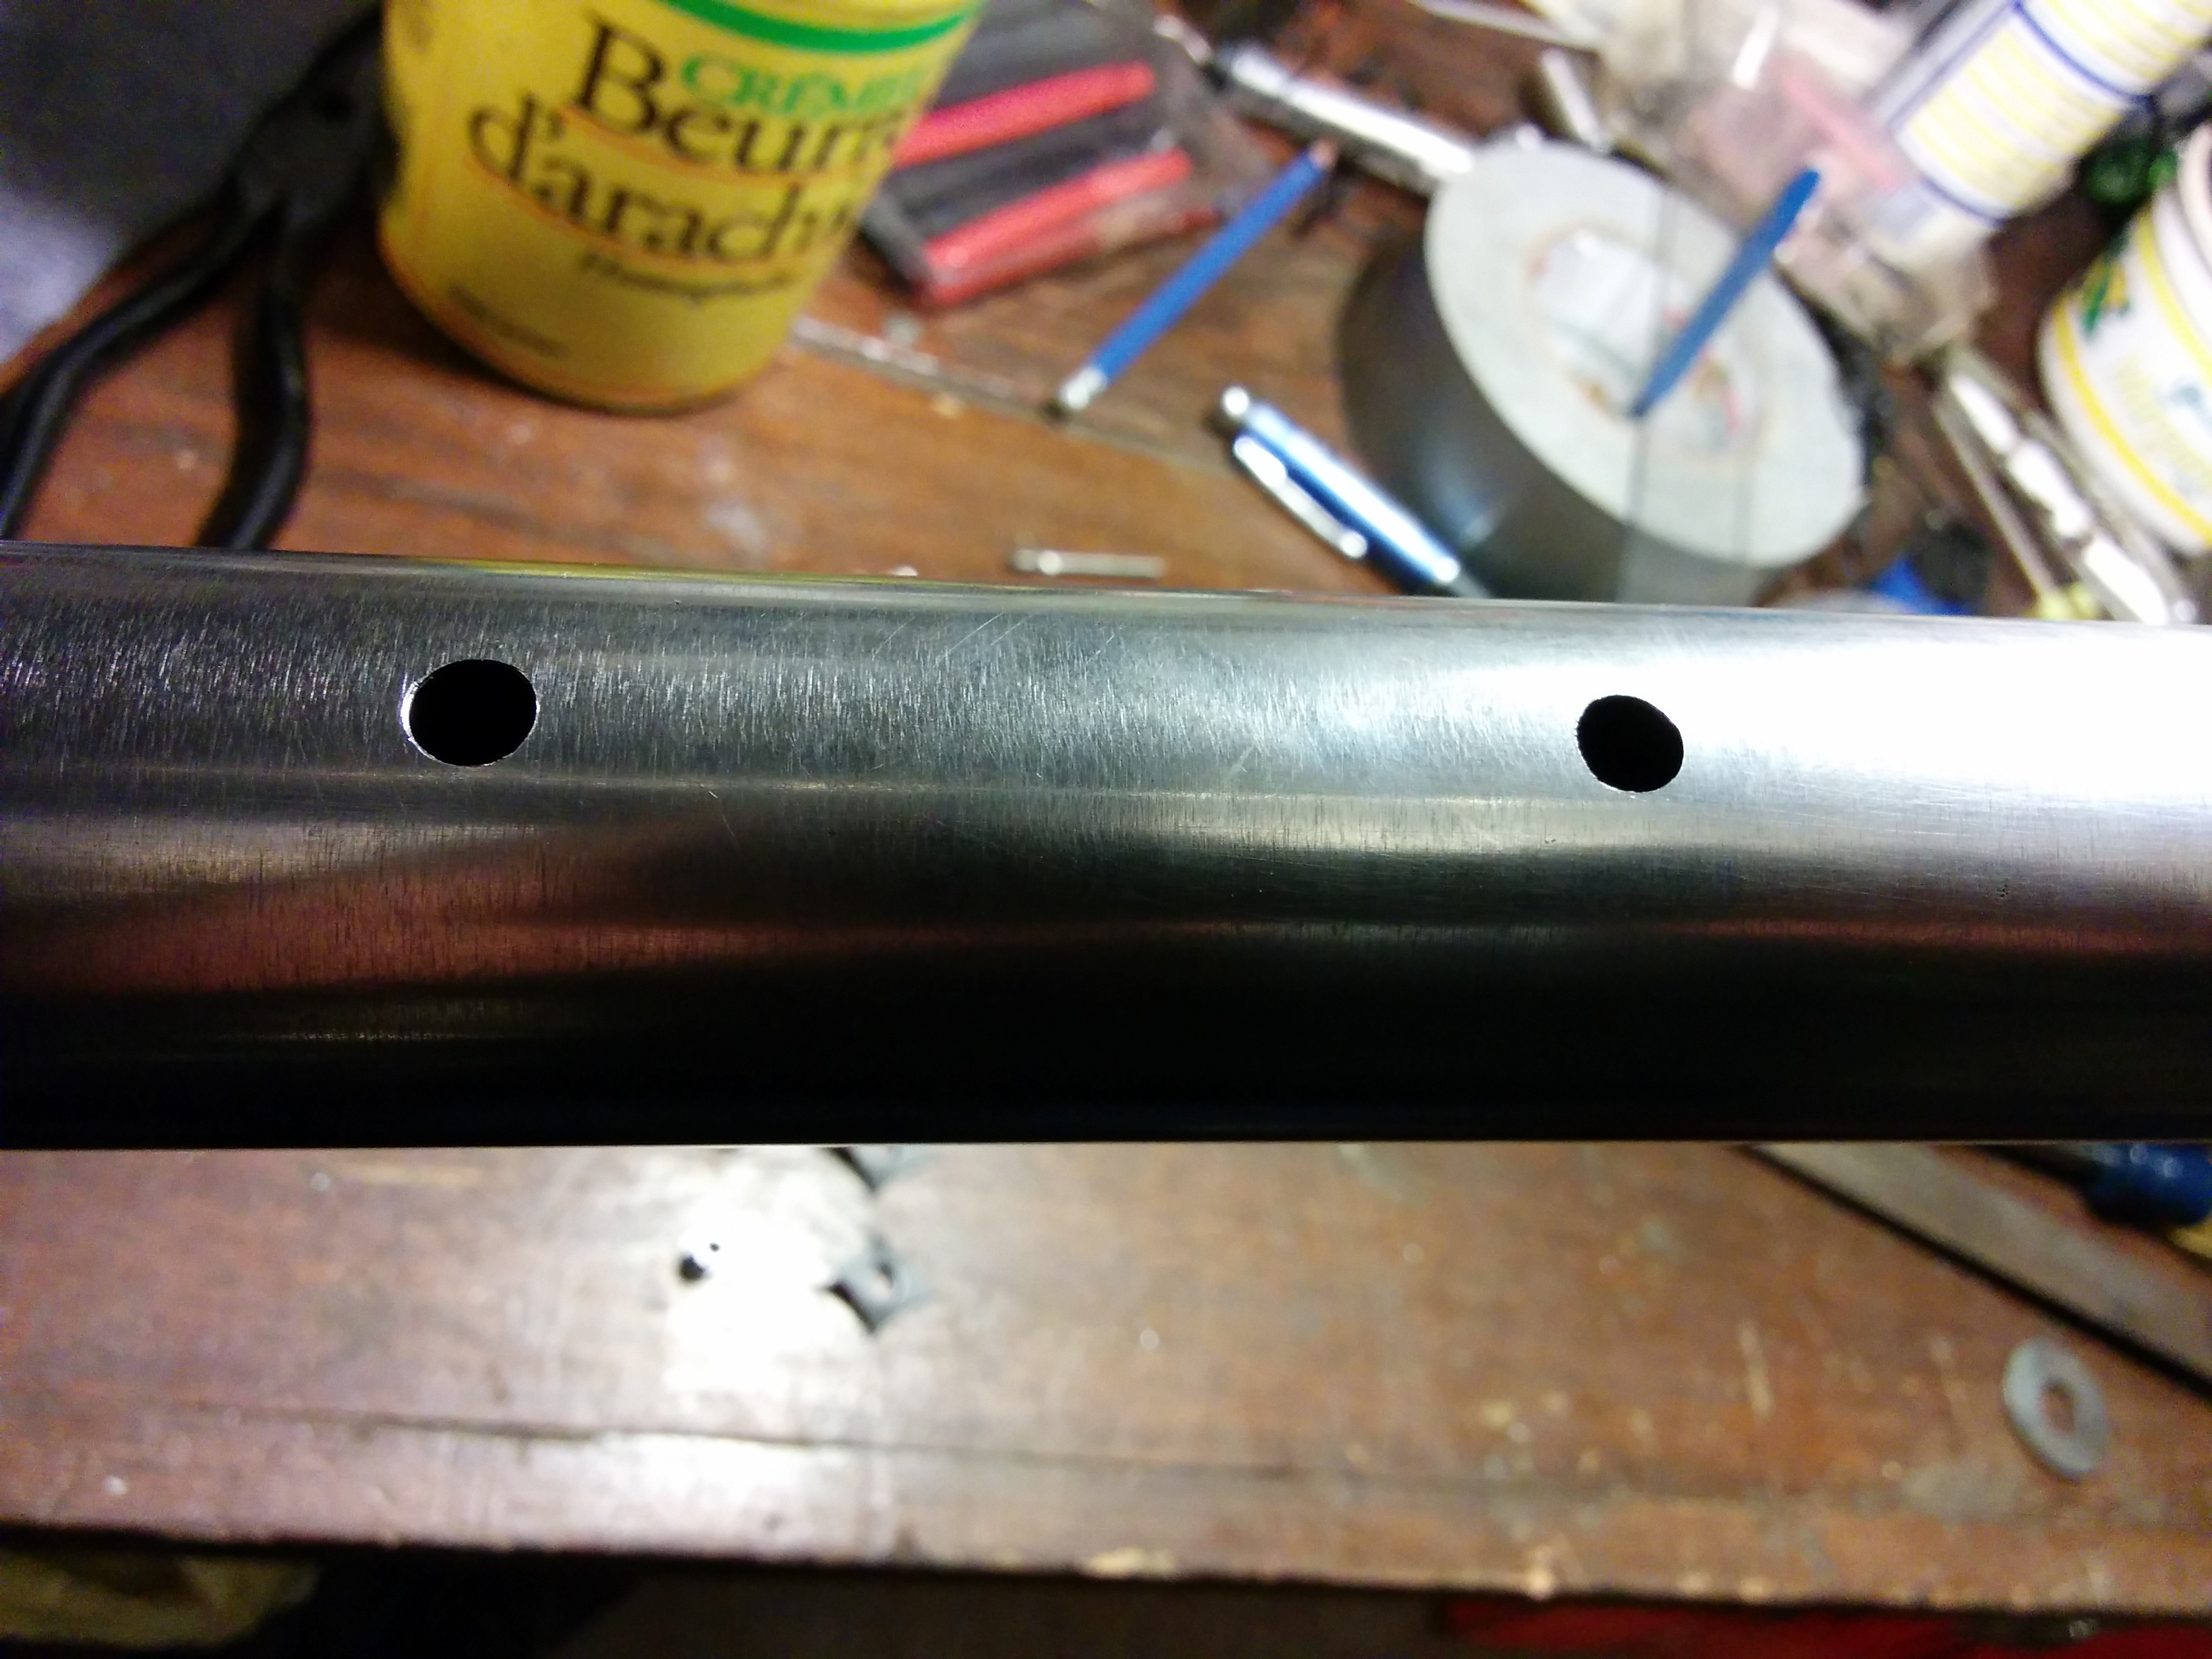
This is an easy joint. Having the parts square and centered is the only concern. The seat tube’s miter is made with a tube miter program which generates a pattern that you print, cut out and tape to the tube. Some spray paint on the tubing and paper leaves behind a mask showing where to cut away the steel. The BB shell gets a vent hole drilled where the seat tube meets.
The next joint is easy too. However, lots of math is needed beforehand to get the correct placement of the paper miter masks on the opposite ends of the down tube. The head tube to down tube joint has to be at the exact angle called for in the plans. A vent hole is drilled like before.
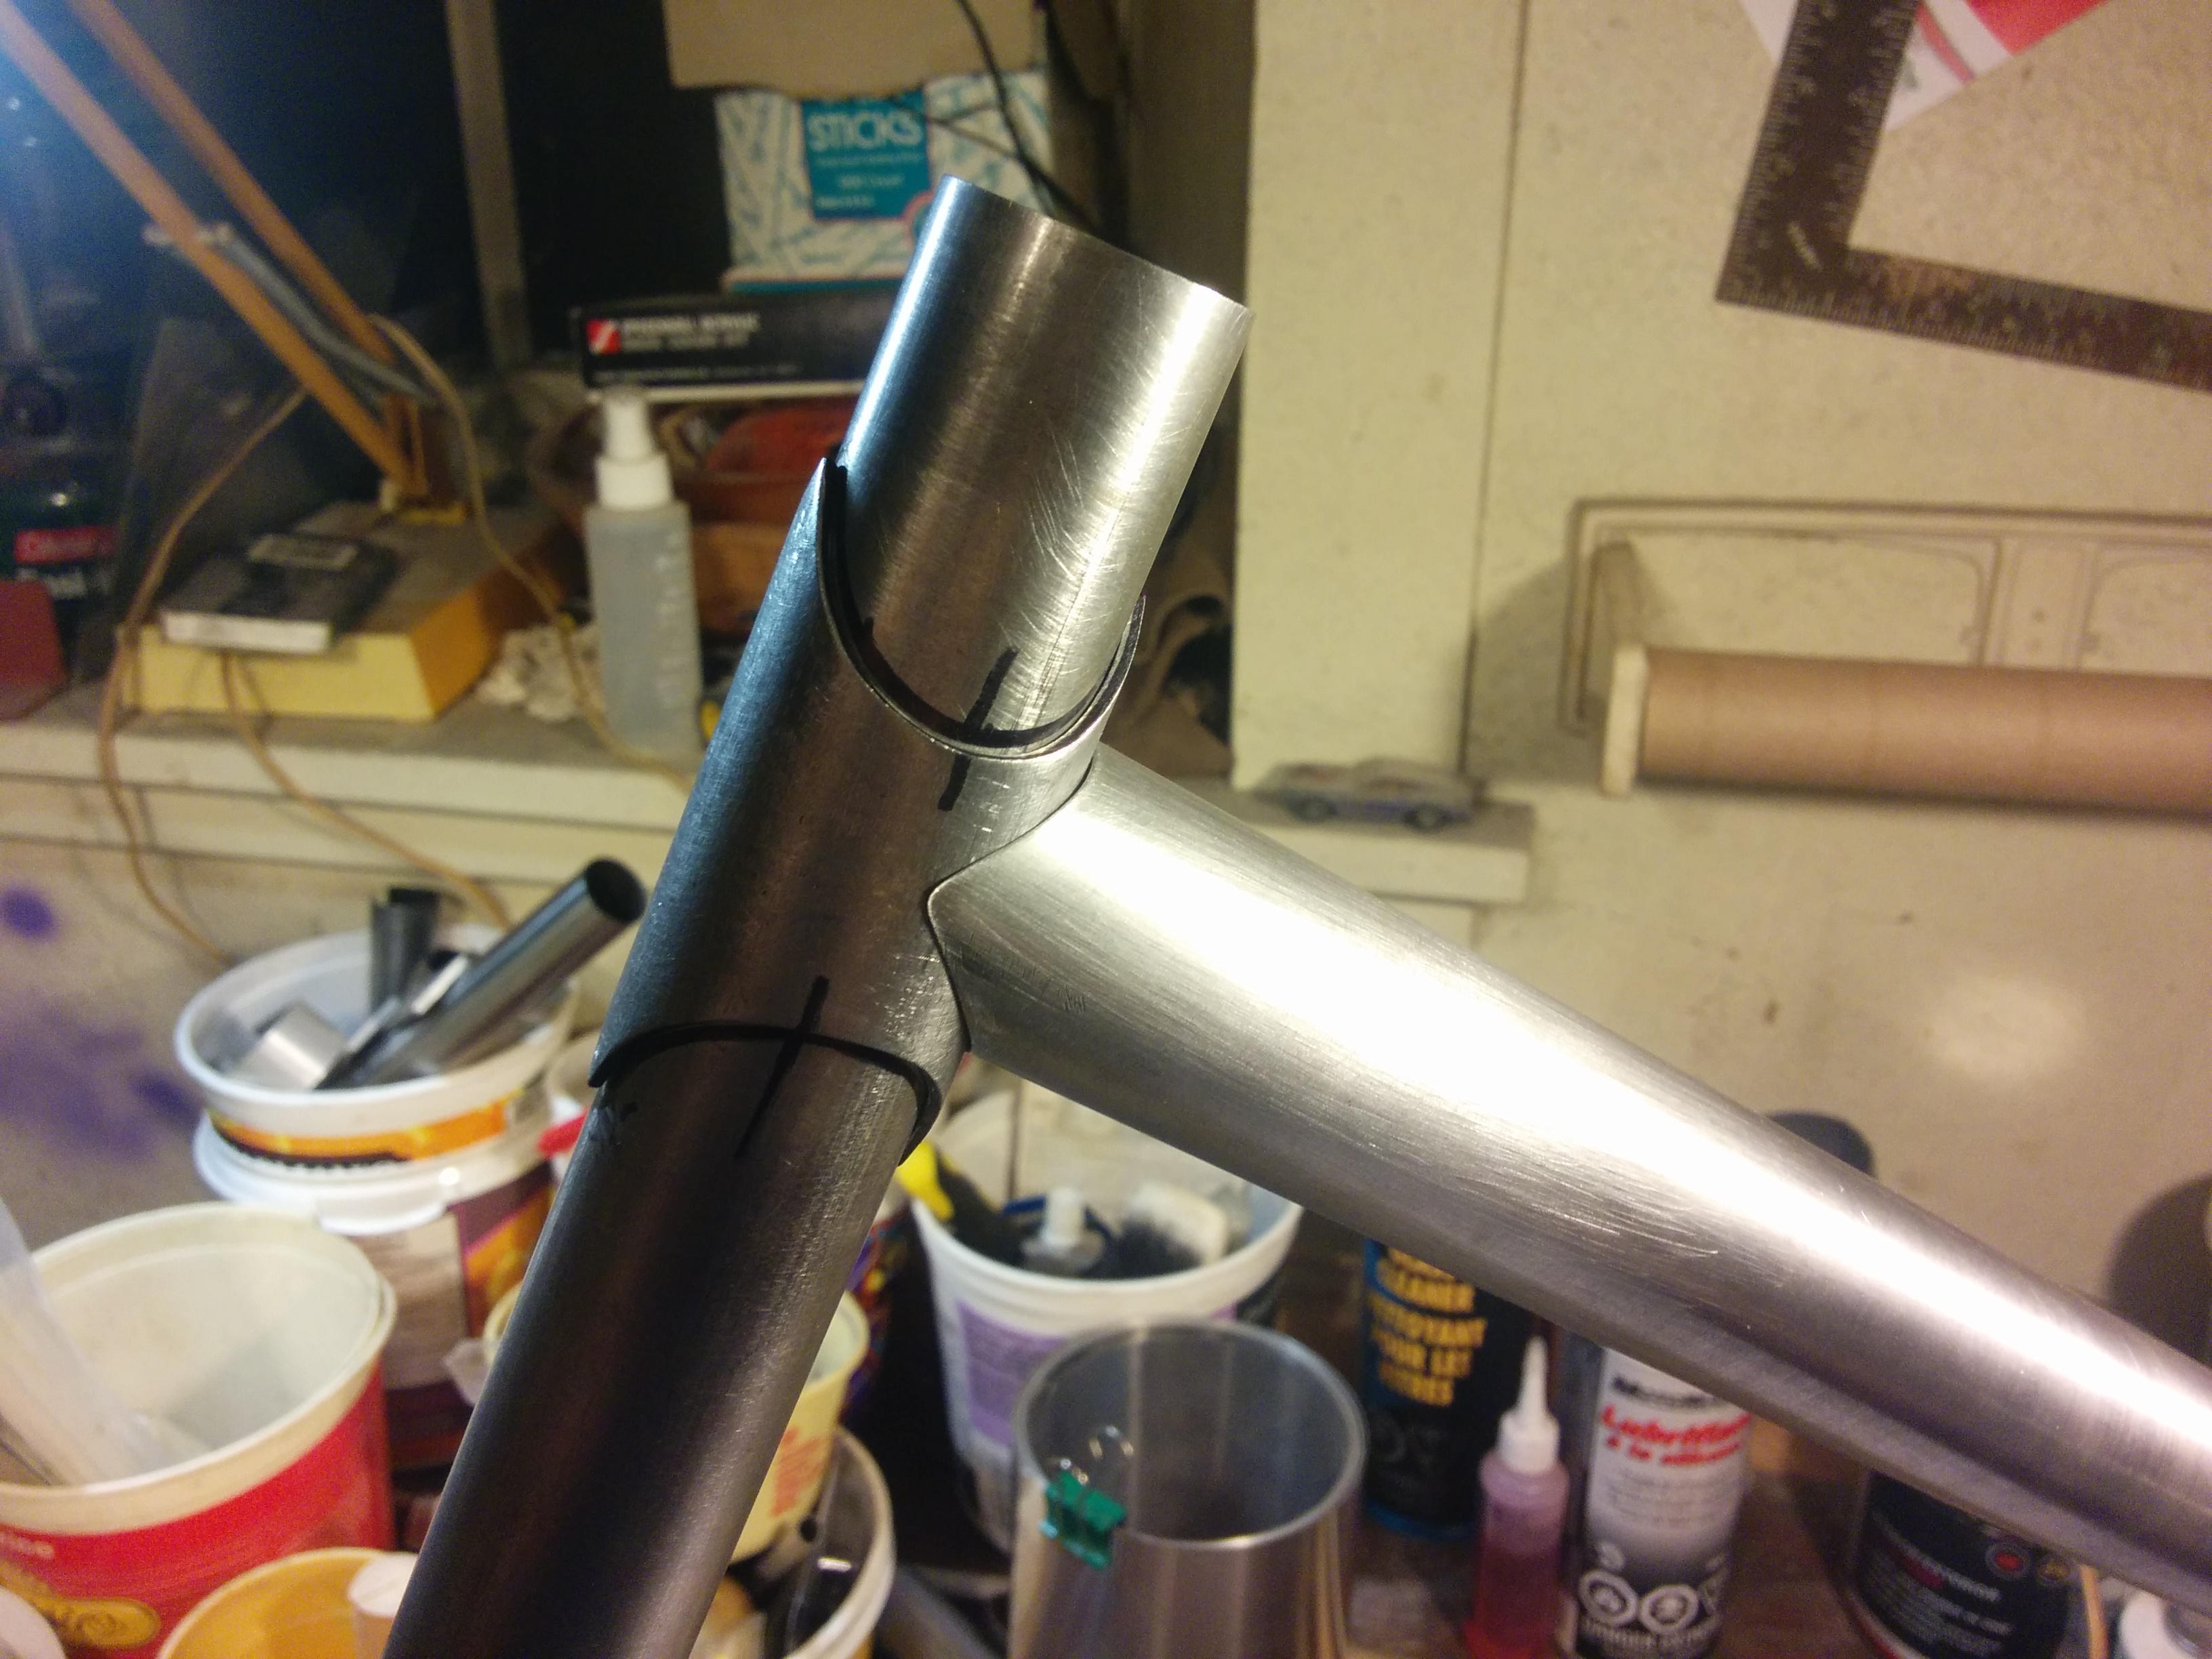
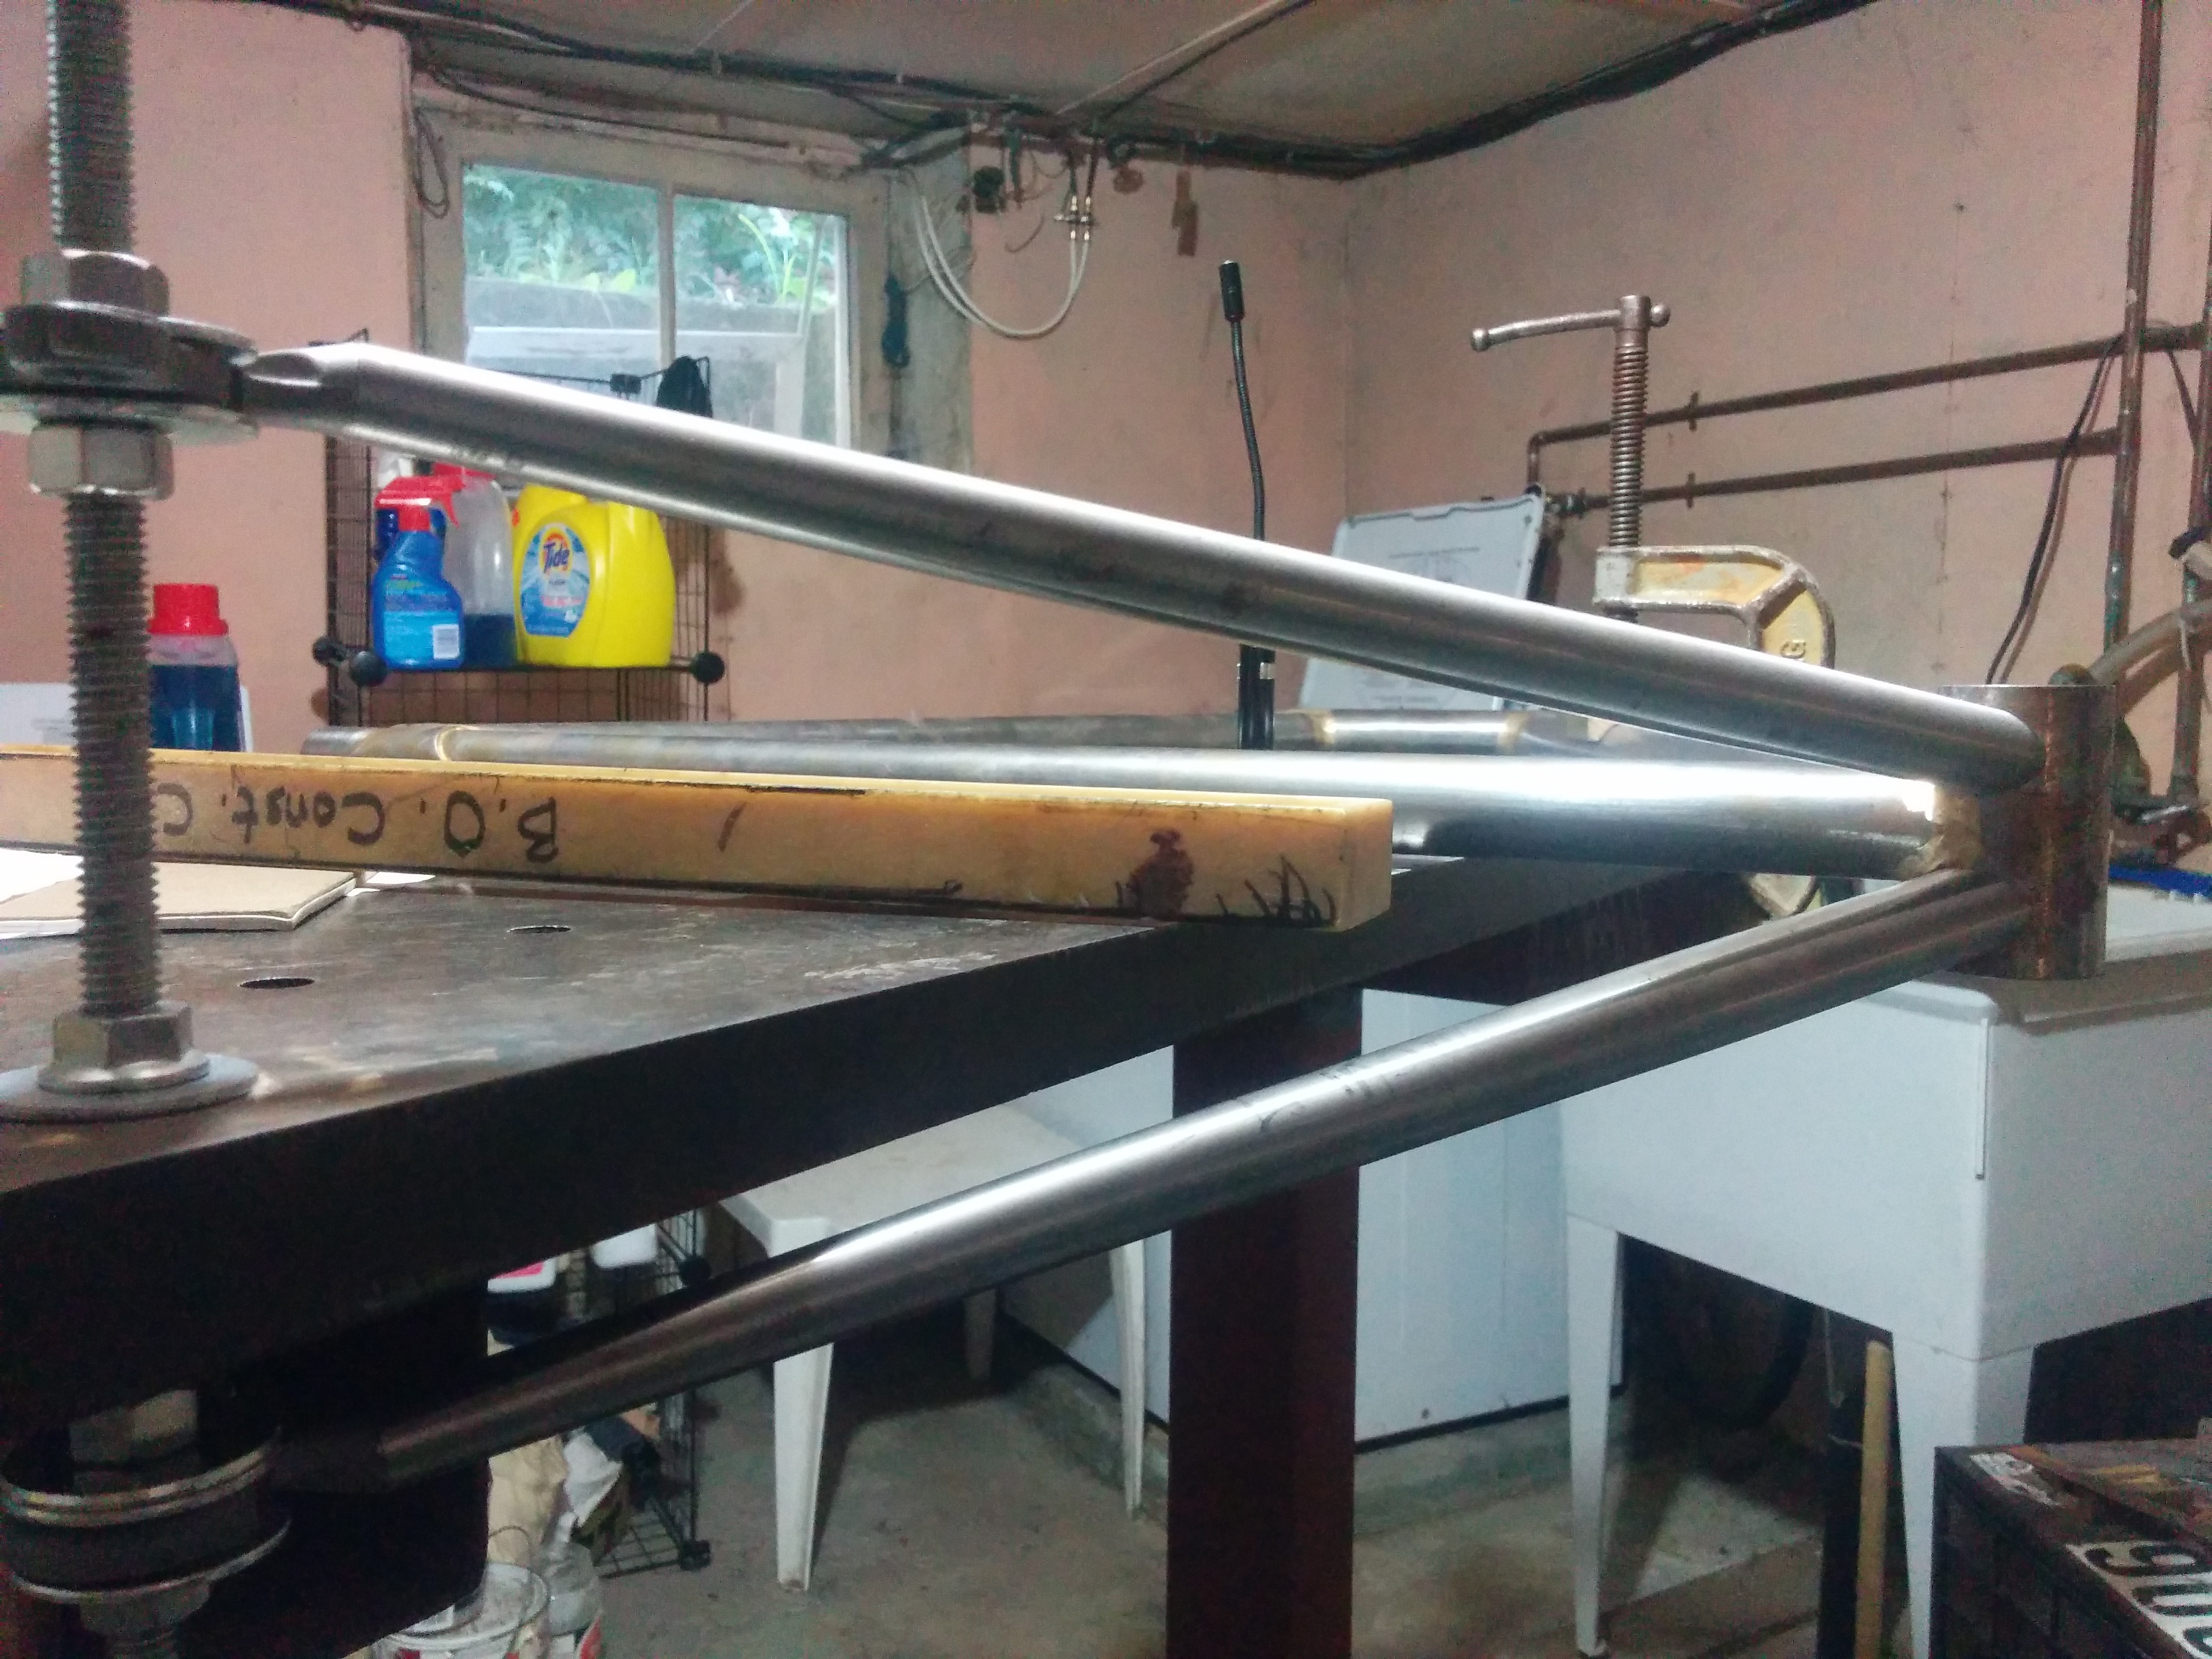
Joining the down tube to the BB shell and seat tube is difficult and I balked at the work for over a year. 4 tubes need very careful scrutiny. The head tube needs to be parallel to the seat tube and also on the same plane. The down tube has to meet the BB shell dead center and perpendicular, and also needs to be at the angle determined from the plans in relation to the seat tube.
The down tube can’t actually meet the BB shell unless some of it is cut away because the seat tube is in the way. Cutting away the down tube is done entirely by eye. The orientation of the seat tube-BB shell assembly must be checked before drilling a vent hold for the down tube so that the reverse threading ends up on the correct side of the frame.
Here’s where I talk about the fear factor. Fillet brazing, the method I use to build frames, generates a lot of heat. The process brings the steel up to 1500 f., just hot enough to melt the brass rod used to join the various tubes, but below the melting point of steel. Brass is sweated into the the slight gap between parts and then built up in a fillet which is then filed down smooth. Like welding, the process can cause warping in the finished joint.
Controlling the amount of warping is what separates the experts from the amateurs and this is only my second frame. This time I know things are going to warp but I’m scared of breaking stuff when I begin cold setting, having cracked a tube on my first frame. ‘Cold setting’ is the industry term for bending everything back into alignment after the frame is cool. The bicycle industry has machines for this job but I have nothing more than my strength and some creativity.
I eventually get the complicated assembly jigged up and brazed and it comes out with some warp between the down tube and BB shell. They aren’t perpendicular and it’s a massive effort to bend them back into alignment. I end up clamping the BB shell to my 180 lb surface plate and cold set by pulling up on the down tube with all my might, finally coaxing the metal back into place.
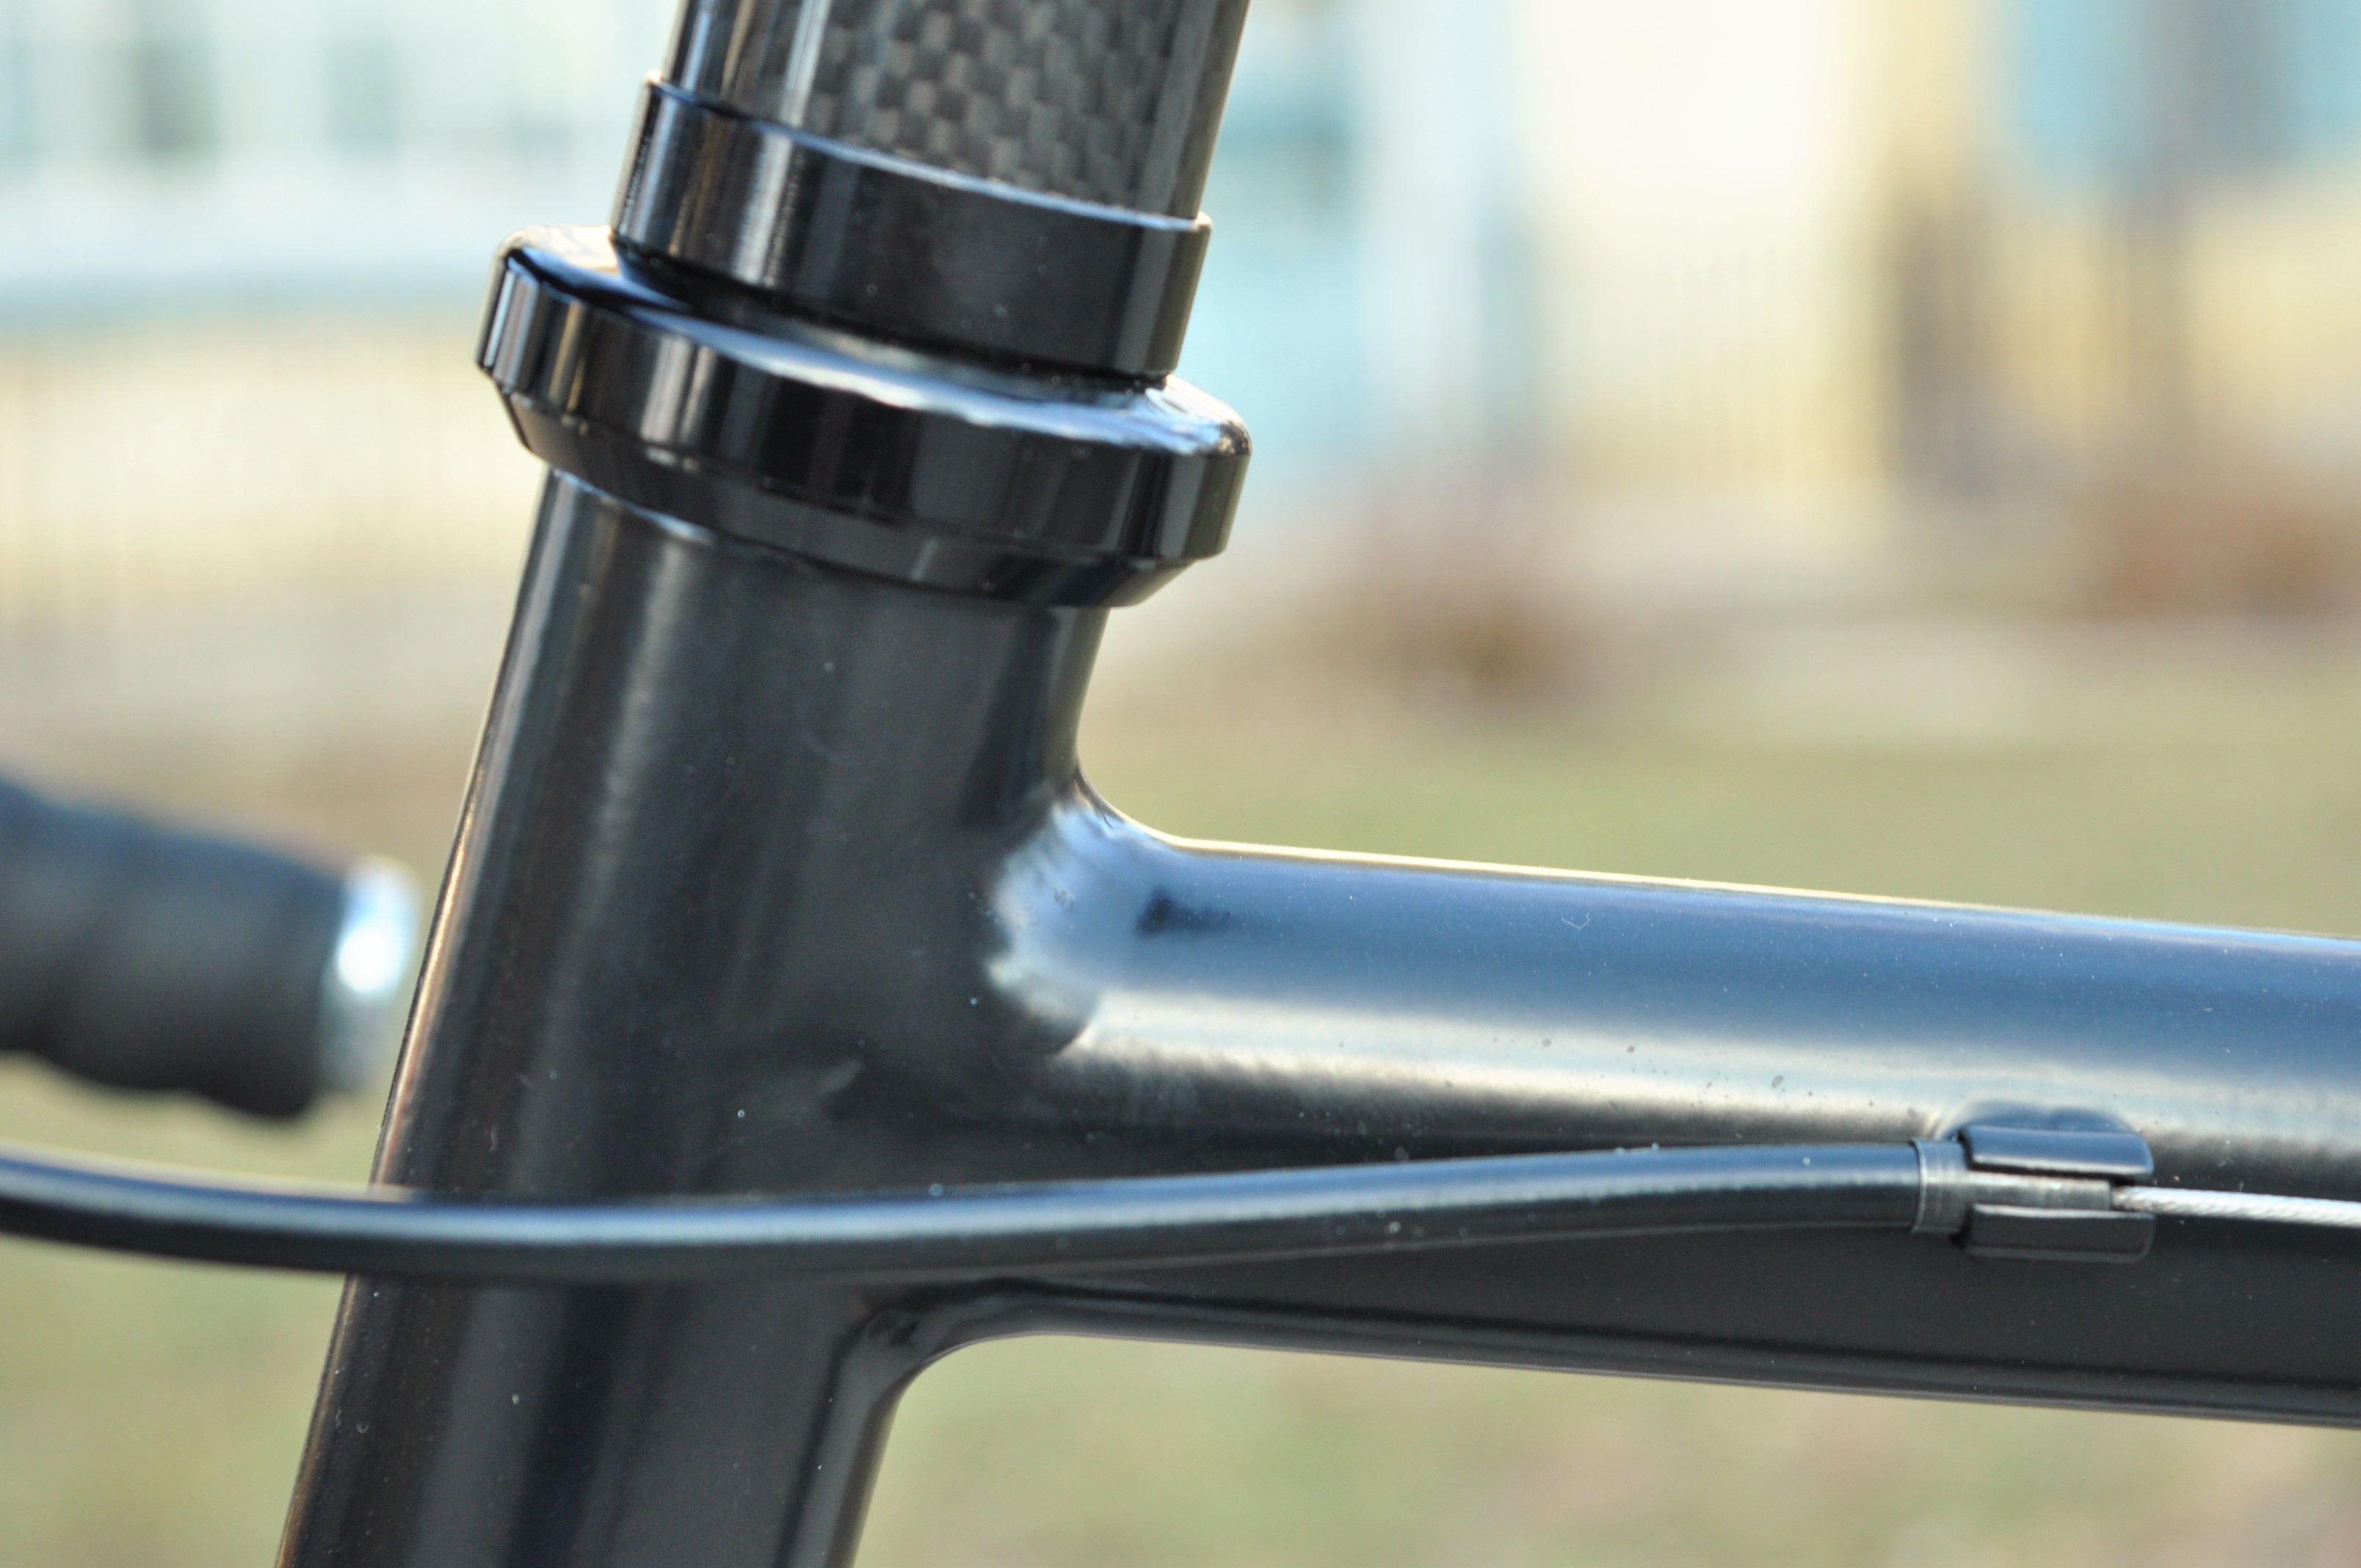
Like last time I use a sleeve for the seat tube to top tube joint. This one is pretty stylish compared to my first one and it gets brazed into place with no issues. The next tube goes in easily enough and my ‘front triangle’ is finished, and like before, sits in my basement for at least another year.
Constructing the rear triangle is almost as hard as the front triangle and you have to do it twice, once for each side of the rear wheel. Screwing this up is a big fear and I dabble with ideas for jigging up the parts for several months before finally coming up with a workable solution.
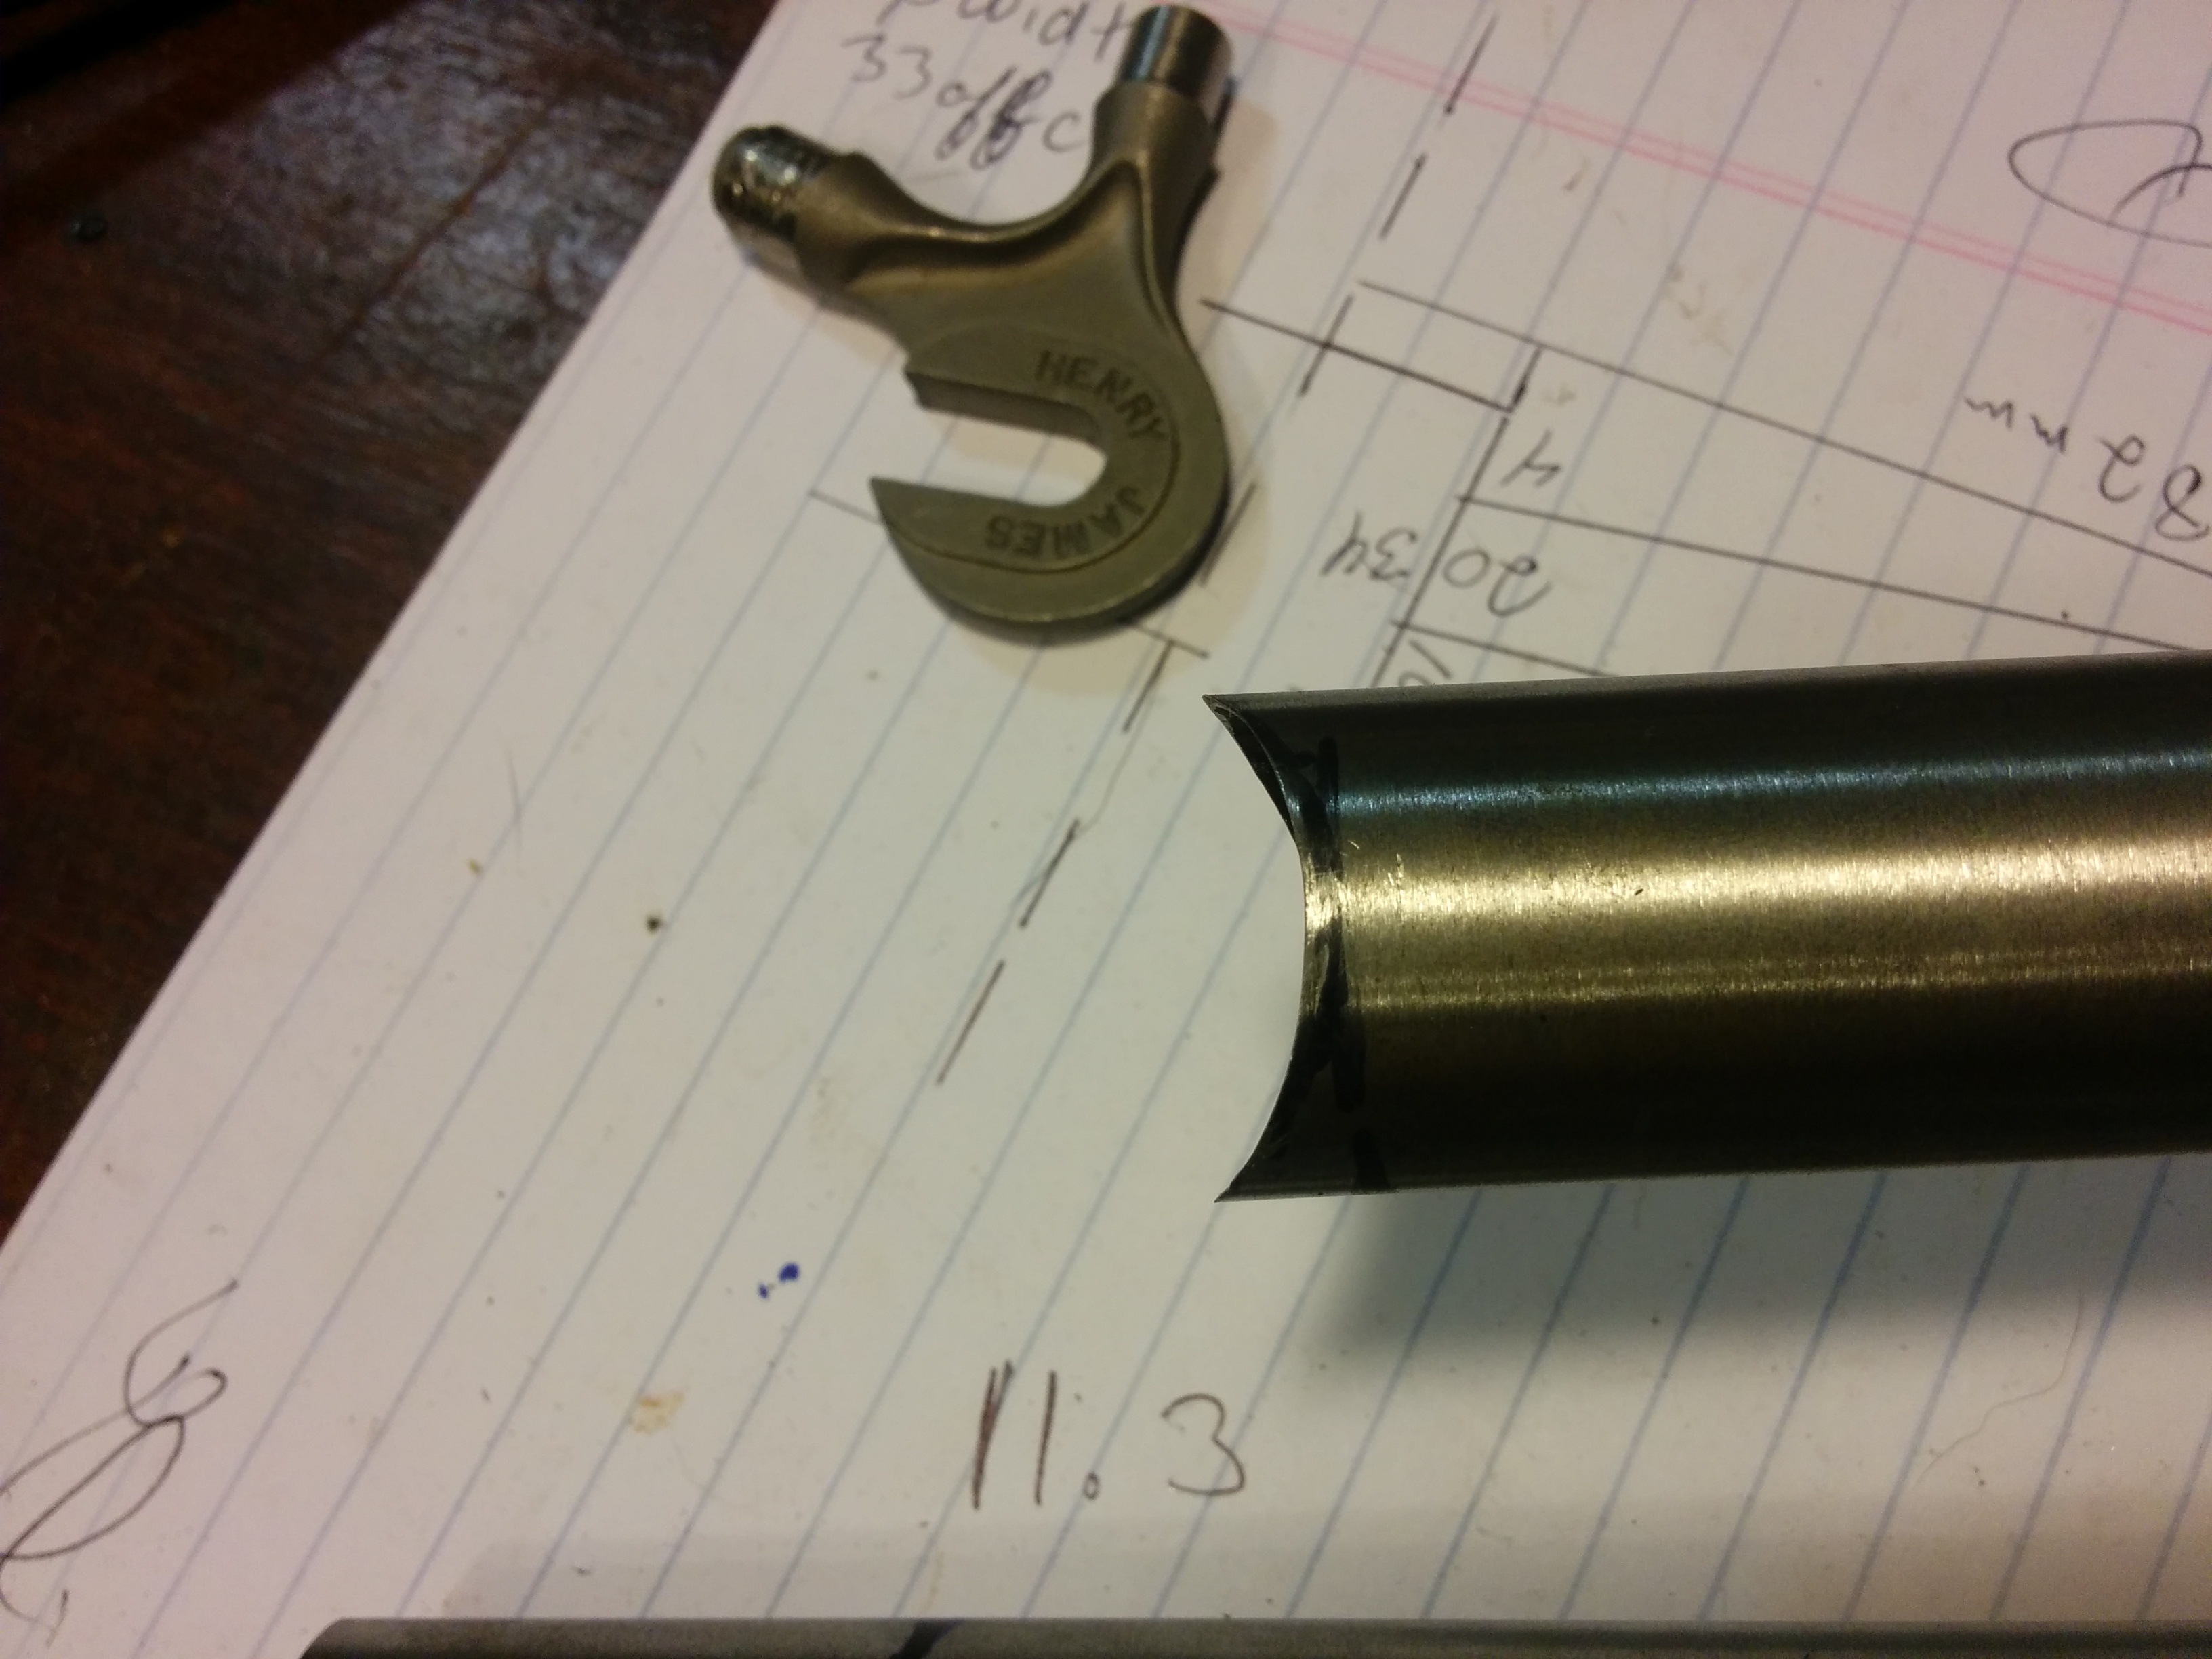
The chain stays aren’t round so I cut the miters by hand. They meet the BB shell at somewhat of a Vee, an angle determined by some consideration. How wide are the biggest tires I might want to use? What’s the axle spacing? How much room do I need for the big and small rings on the cranks?
Once this is sorted out, the stays need to be jigged up and set at the correct angle in relation to the seat tube. This angle is a degree less than my plans called for because my dropouts sit 1 cm below the center line of the chain stays.
I get some warping again, with both tubes out a few degrees. It was a monumental effort to get them property aligned using pipes, a bench vise and a lot of muscle in the process.
The seat stays were easy by comparison although I nearly ruined one of them by cutting it too short. I ended up locating them a bit lower than I wanted, but this is merely a matter of aesthetics.
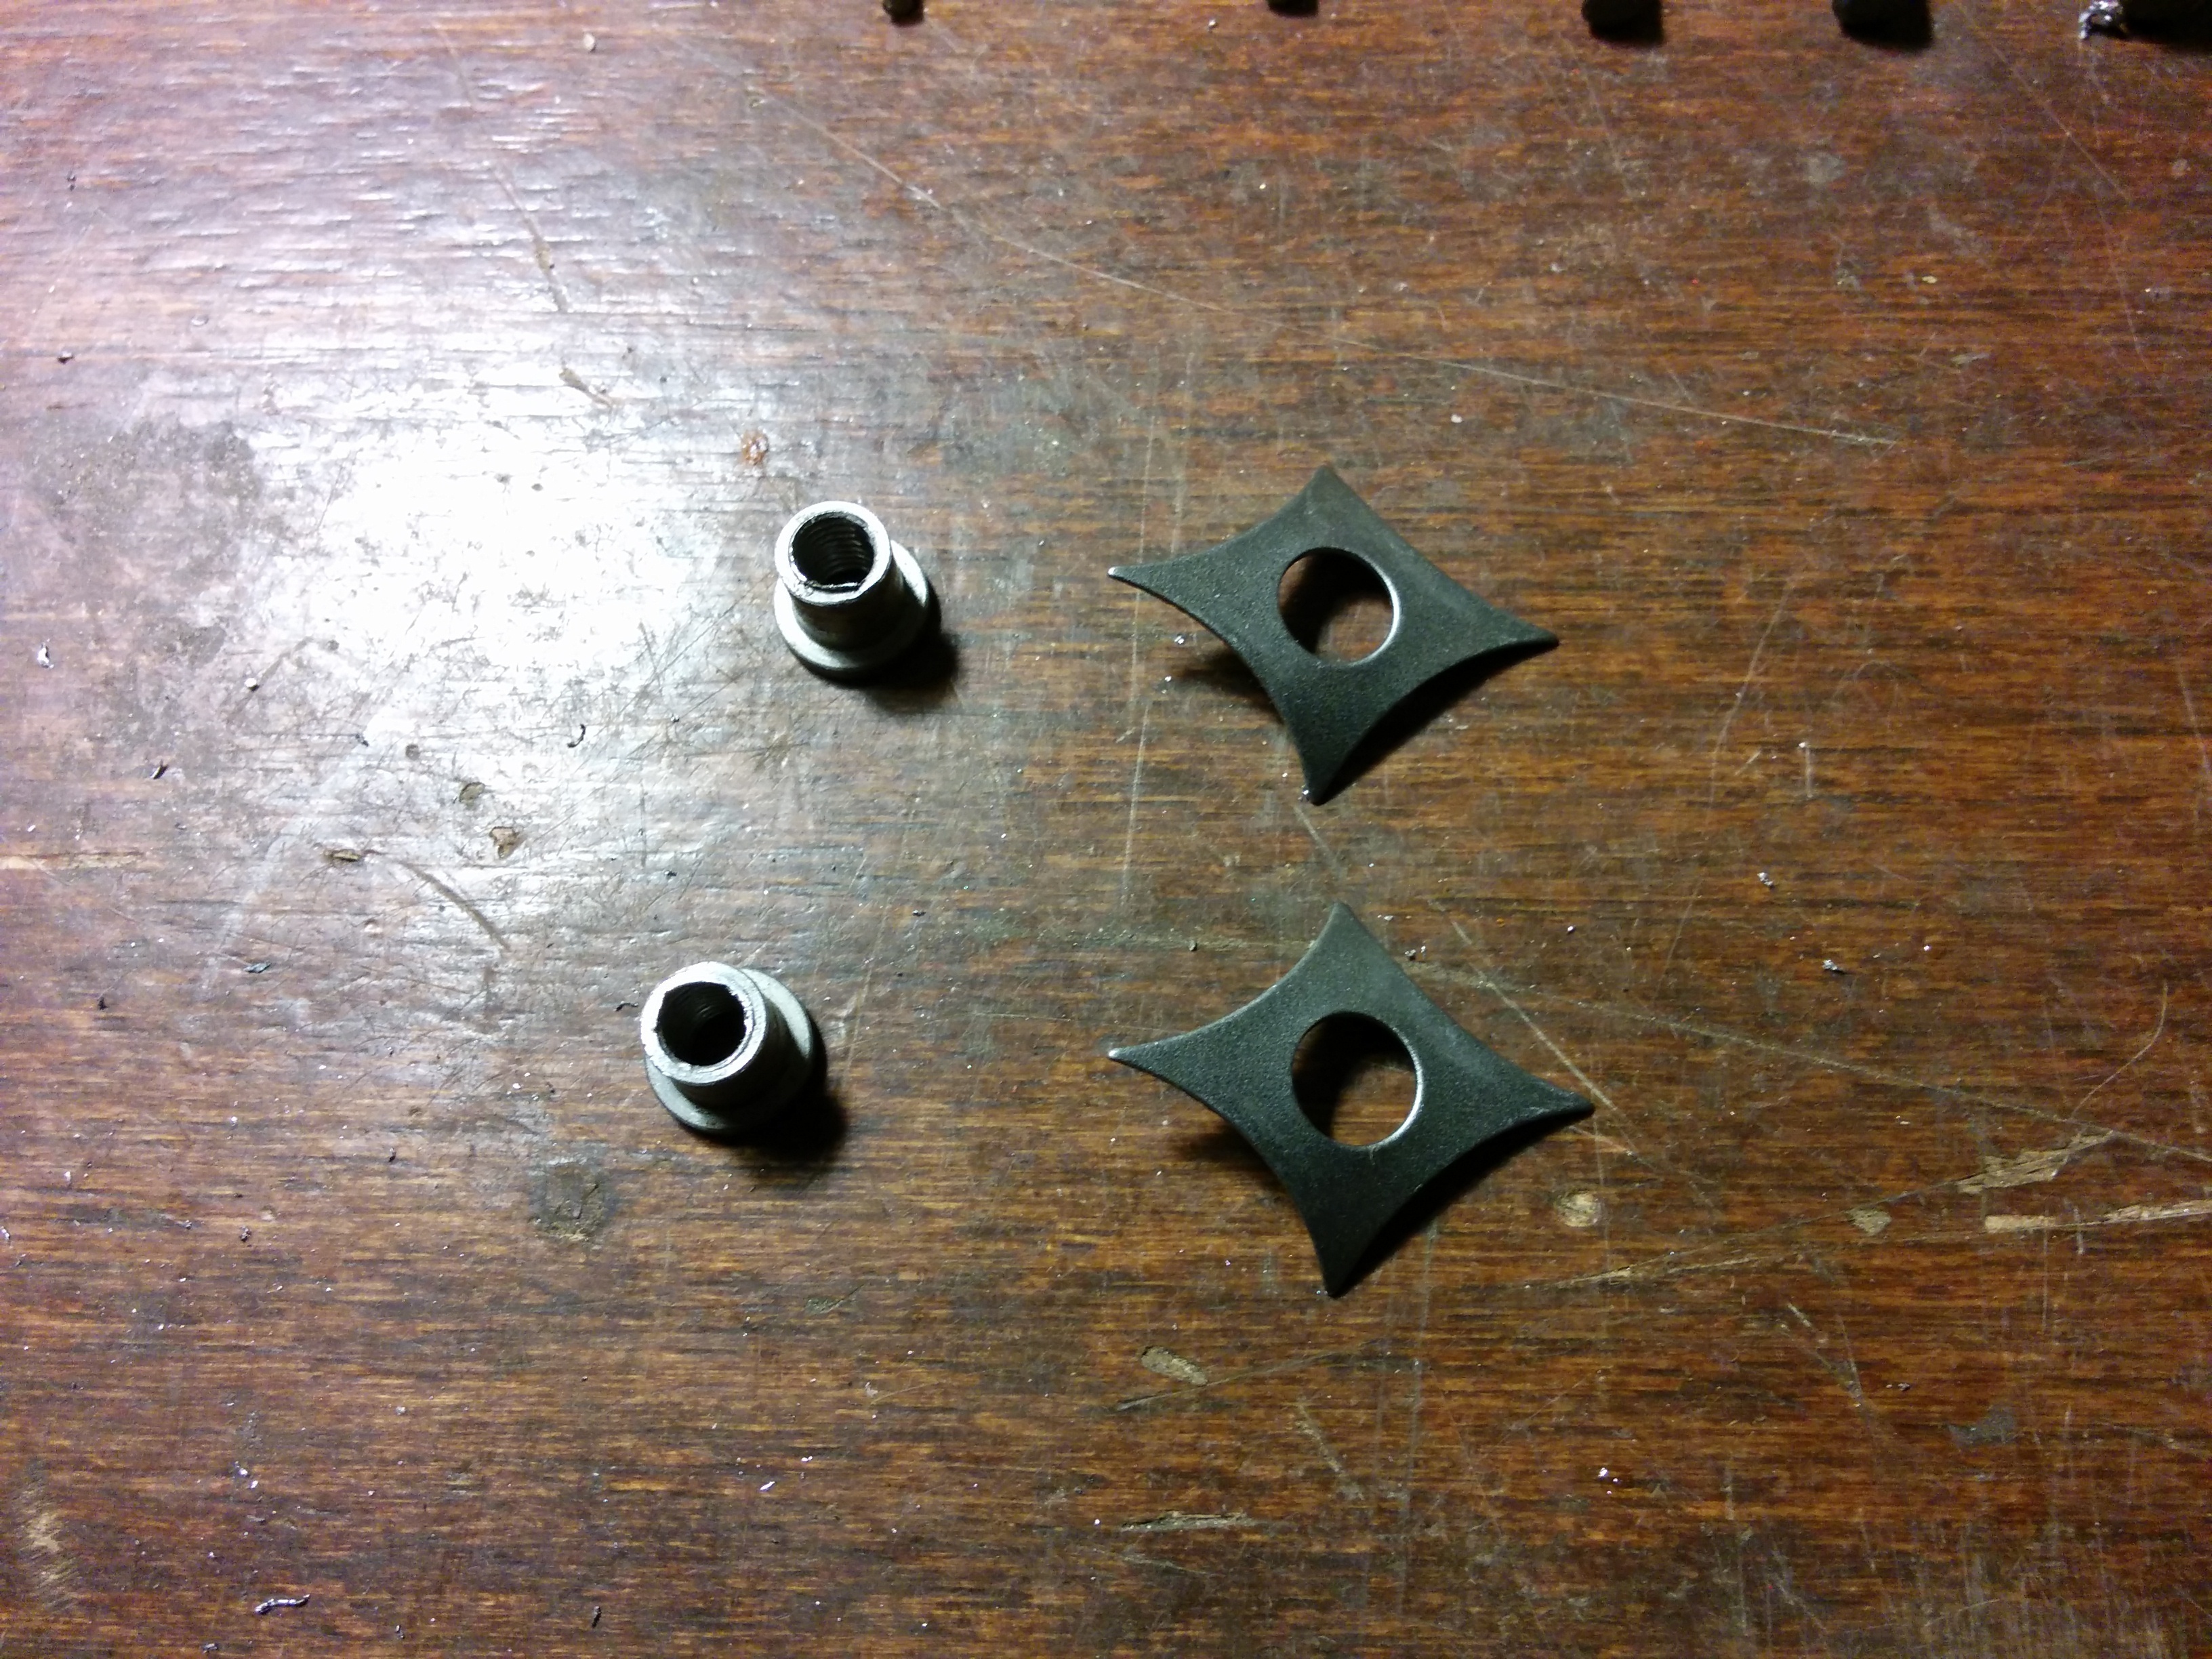
Installing the dropouts was the scariest and most rewarding part of this build by far. The chain stays and seat stays were the right length, and were correctly aligned, but I still wasn’t happy. I put the frame back in the vise and pulled the left side chain stay out another mm.
I check the alignment again with the dropouts set in place and the real wheel installed. Finally I can see what’s needed. A dozen file strokes off the right side seat stay and about the same amount off the left side chain stay. I remove a nick from the dropout which is preventing it from fitting snugly.
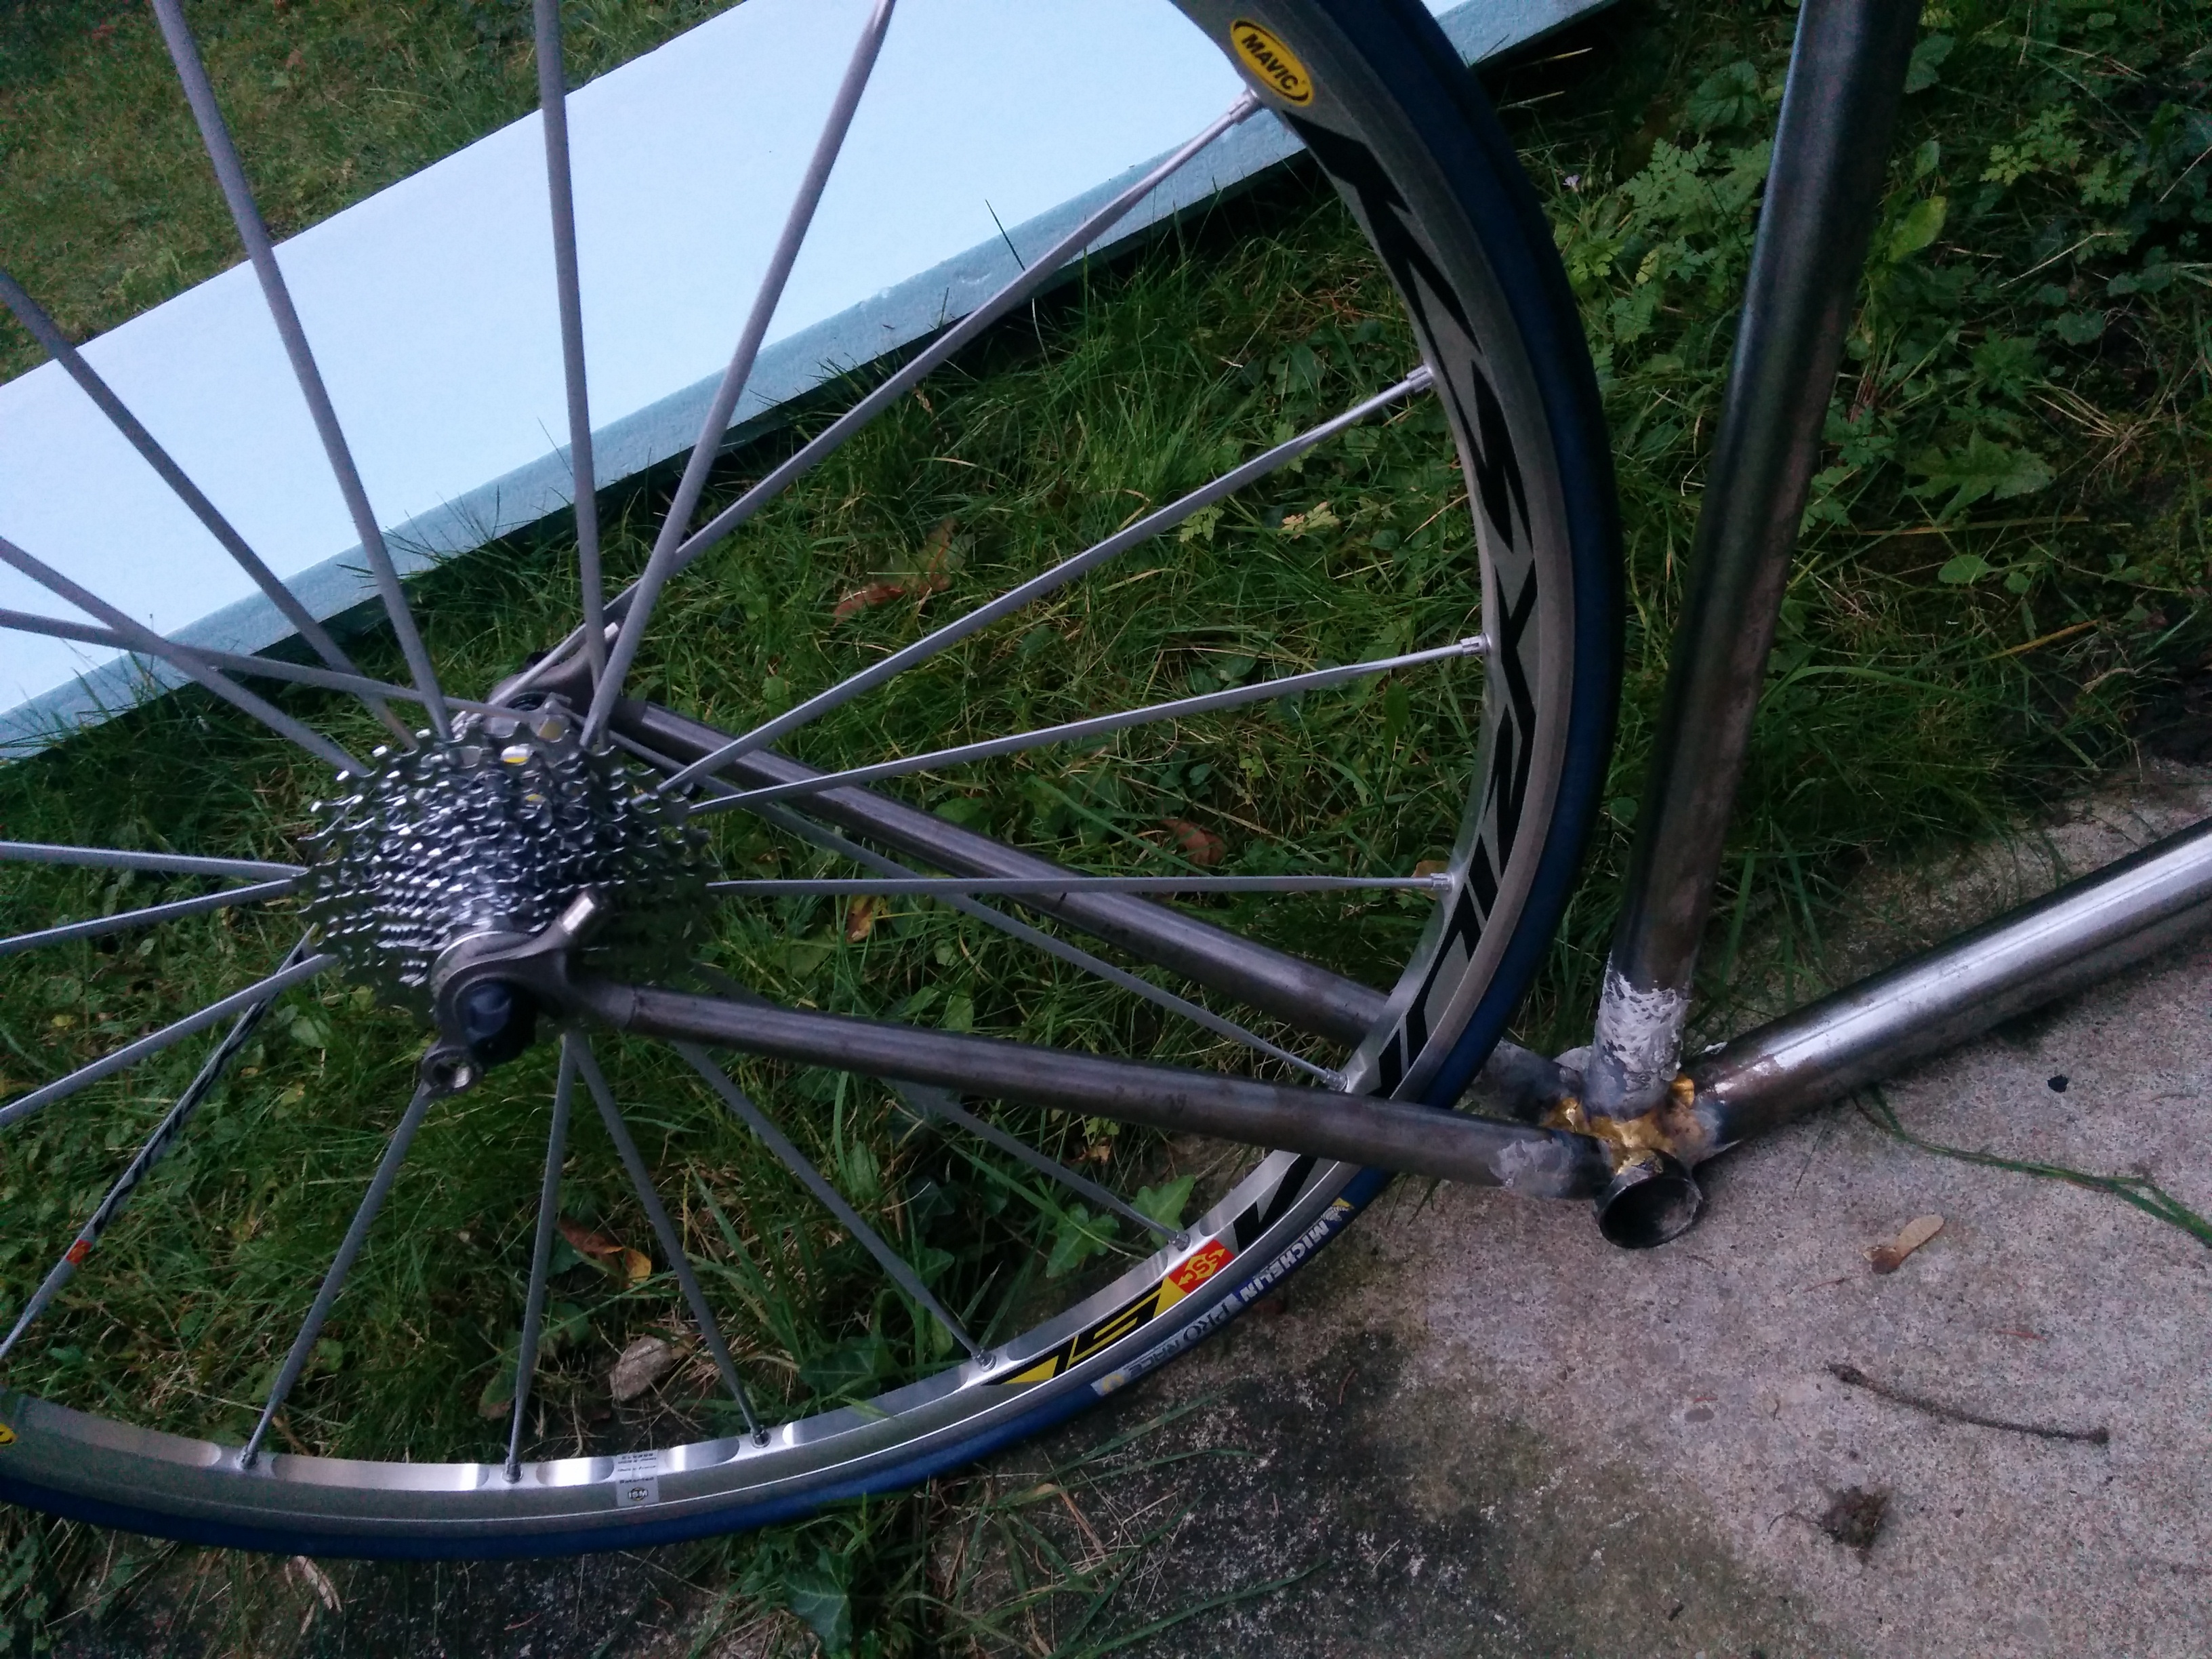
The dropouts are brazed to the seat stays, and then an alignment check once things have cooled. It’s good but I’m nervous. I do the chain stay joints and try to wait for things to cool. I throw on my welding gloves, grab the hot frame and a rear wheel. It goes in perfect, absolutely spot on, and I couldn’t be happier.
The tough stuff is done. The alignment is perfect. Hours later I have the joints filed down and the frame is gleaming! I’m obviously stoked, but riding is still a few days or even weeks away. First thing I need to get the head tube and BB shell faced and the threads of the BB shell need taps run through them. I don’t have the tools needed for these jobs but its work that any well equipped bike shop can do.
I realize that I should have installed the chain stay bridge before getting the machining done. I spend a day panicking over what to do because my chain stay bridge is only an inch away from the back of the BB shell and I’m worried about warping the surfaces I just got machined.
A bridge is a part that causes an ton of debate on the internet. There’s usually two, one connecting the seat stays and one connecting the chain stays. Some frames use them and others don’t. I’m heavy enough to warrant using both, so I figure out how to protect the BB shell by using some kiln insulation I have from another project. It works, and I get the chain stay bridge in place on the morning of my 54th birthday!
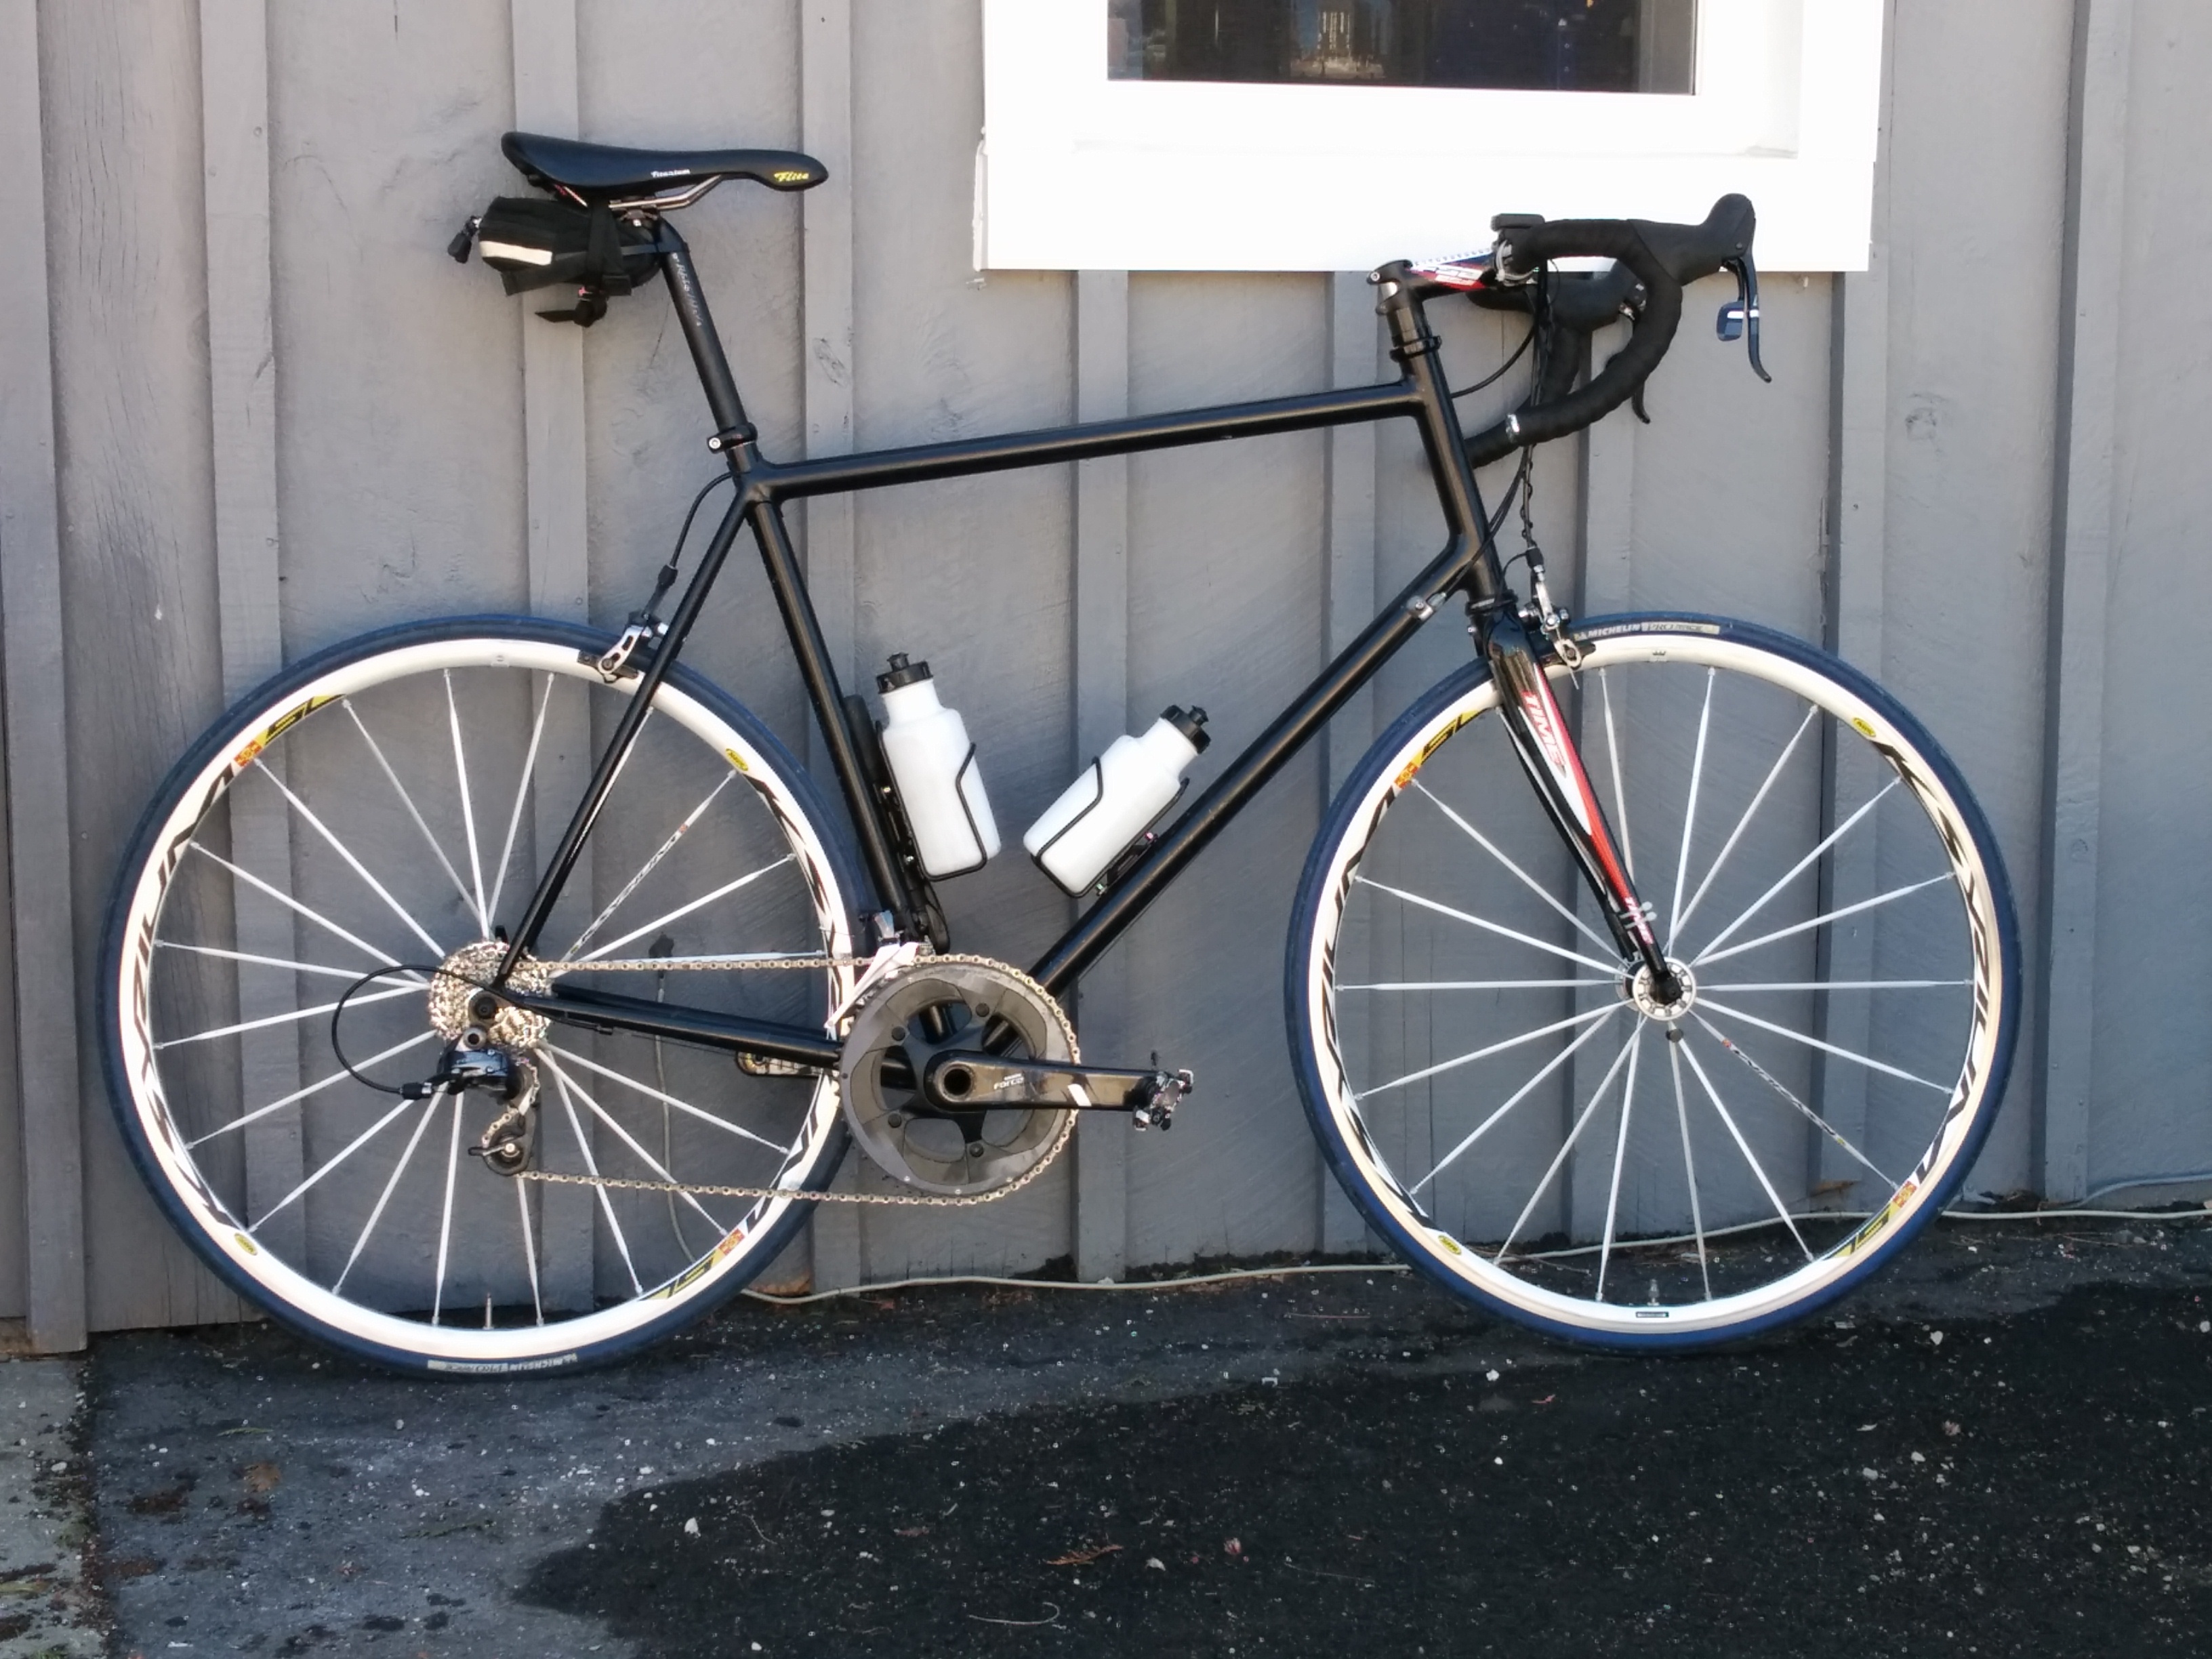
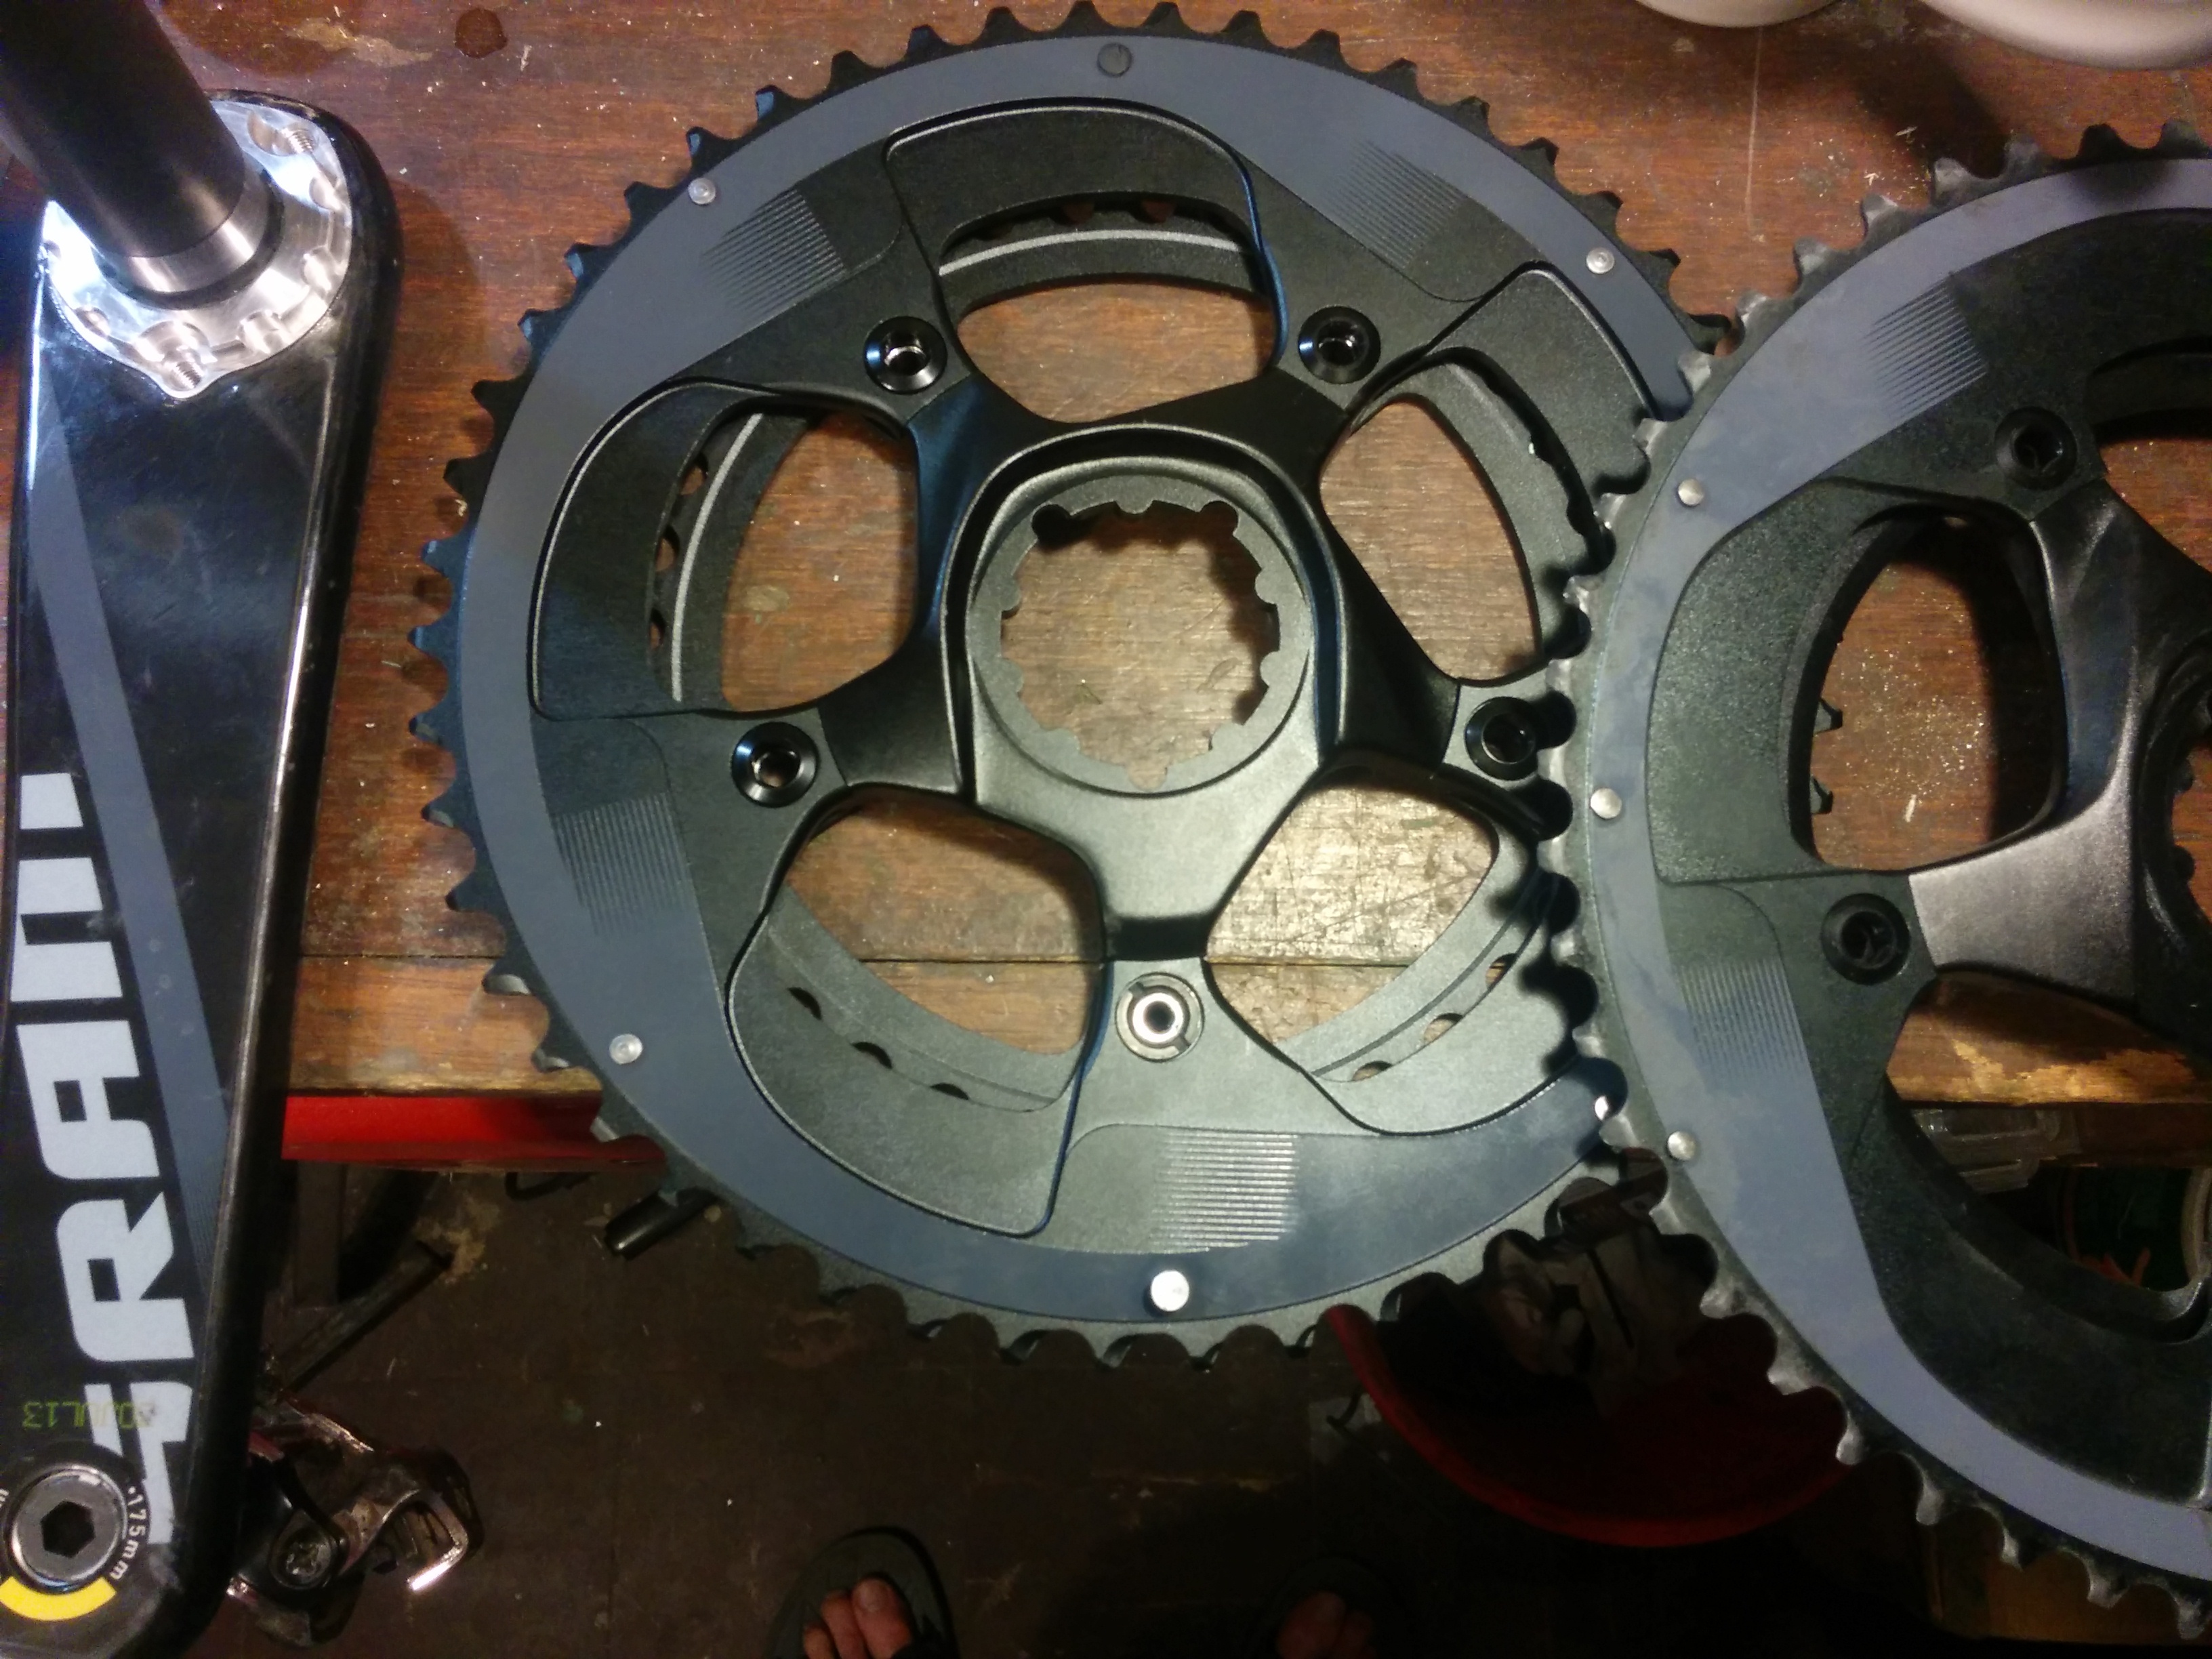
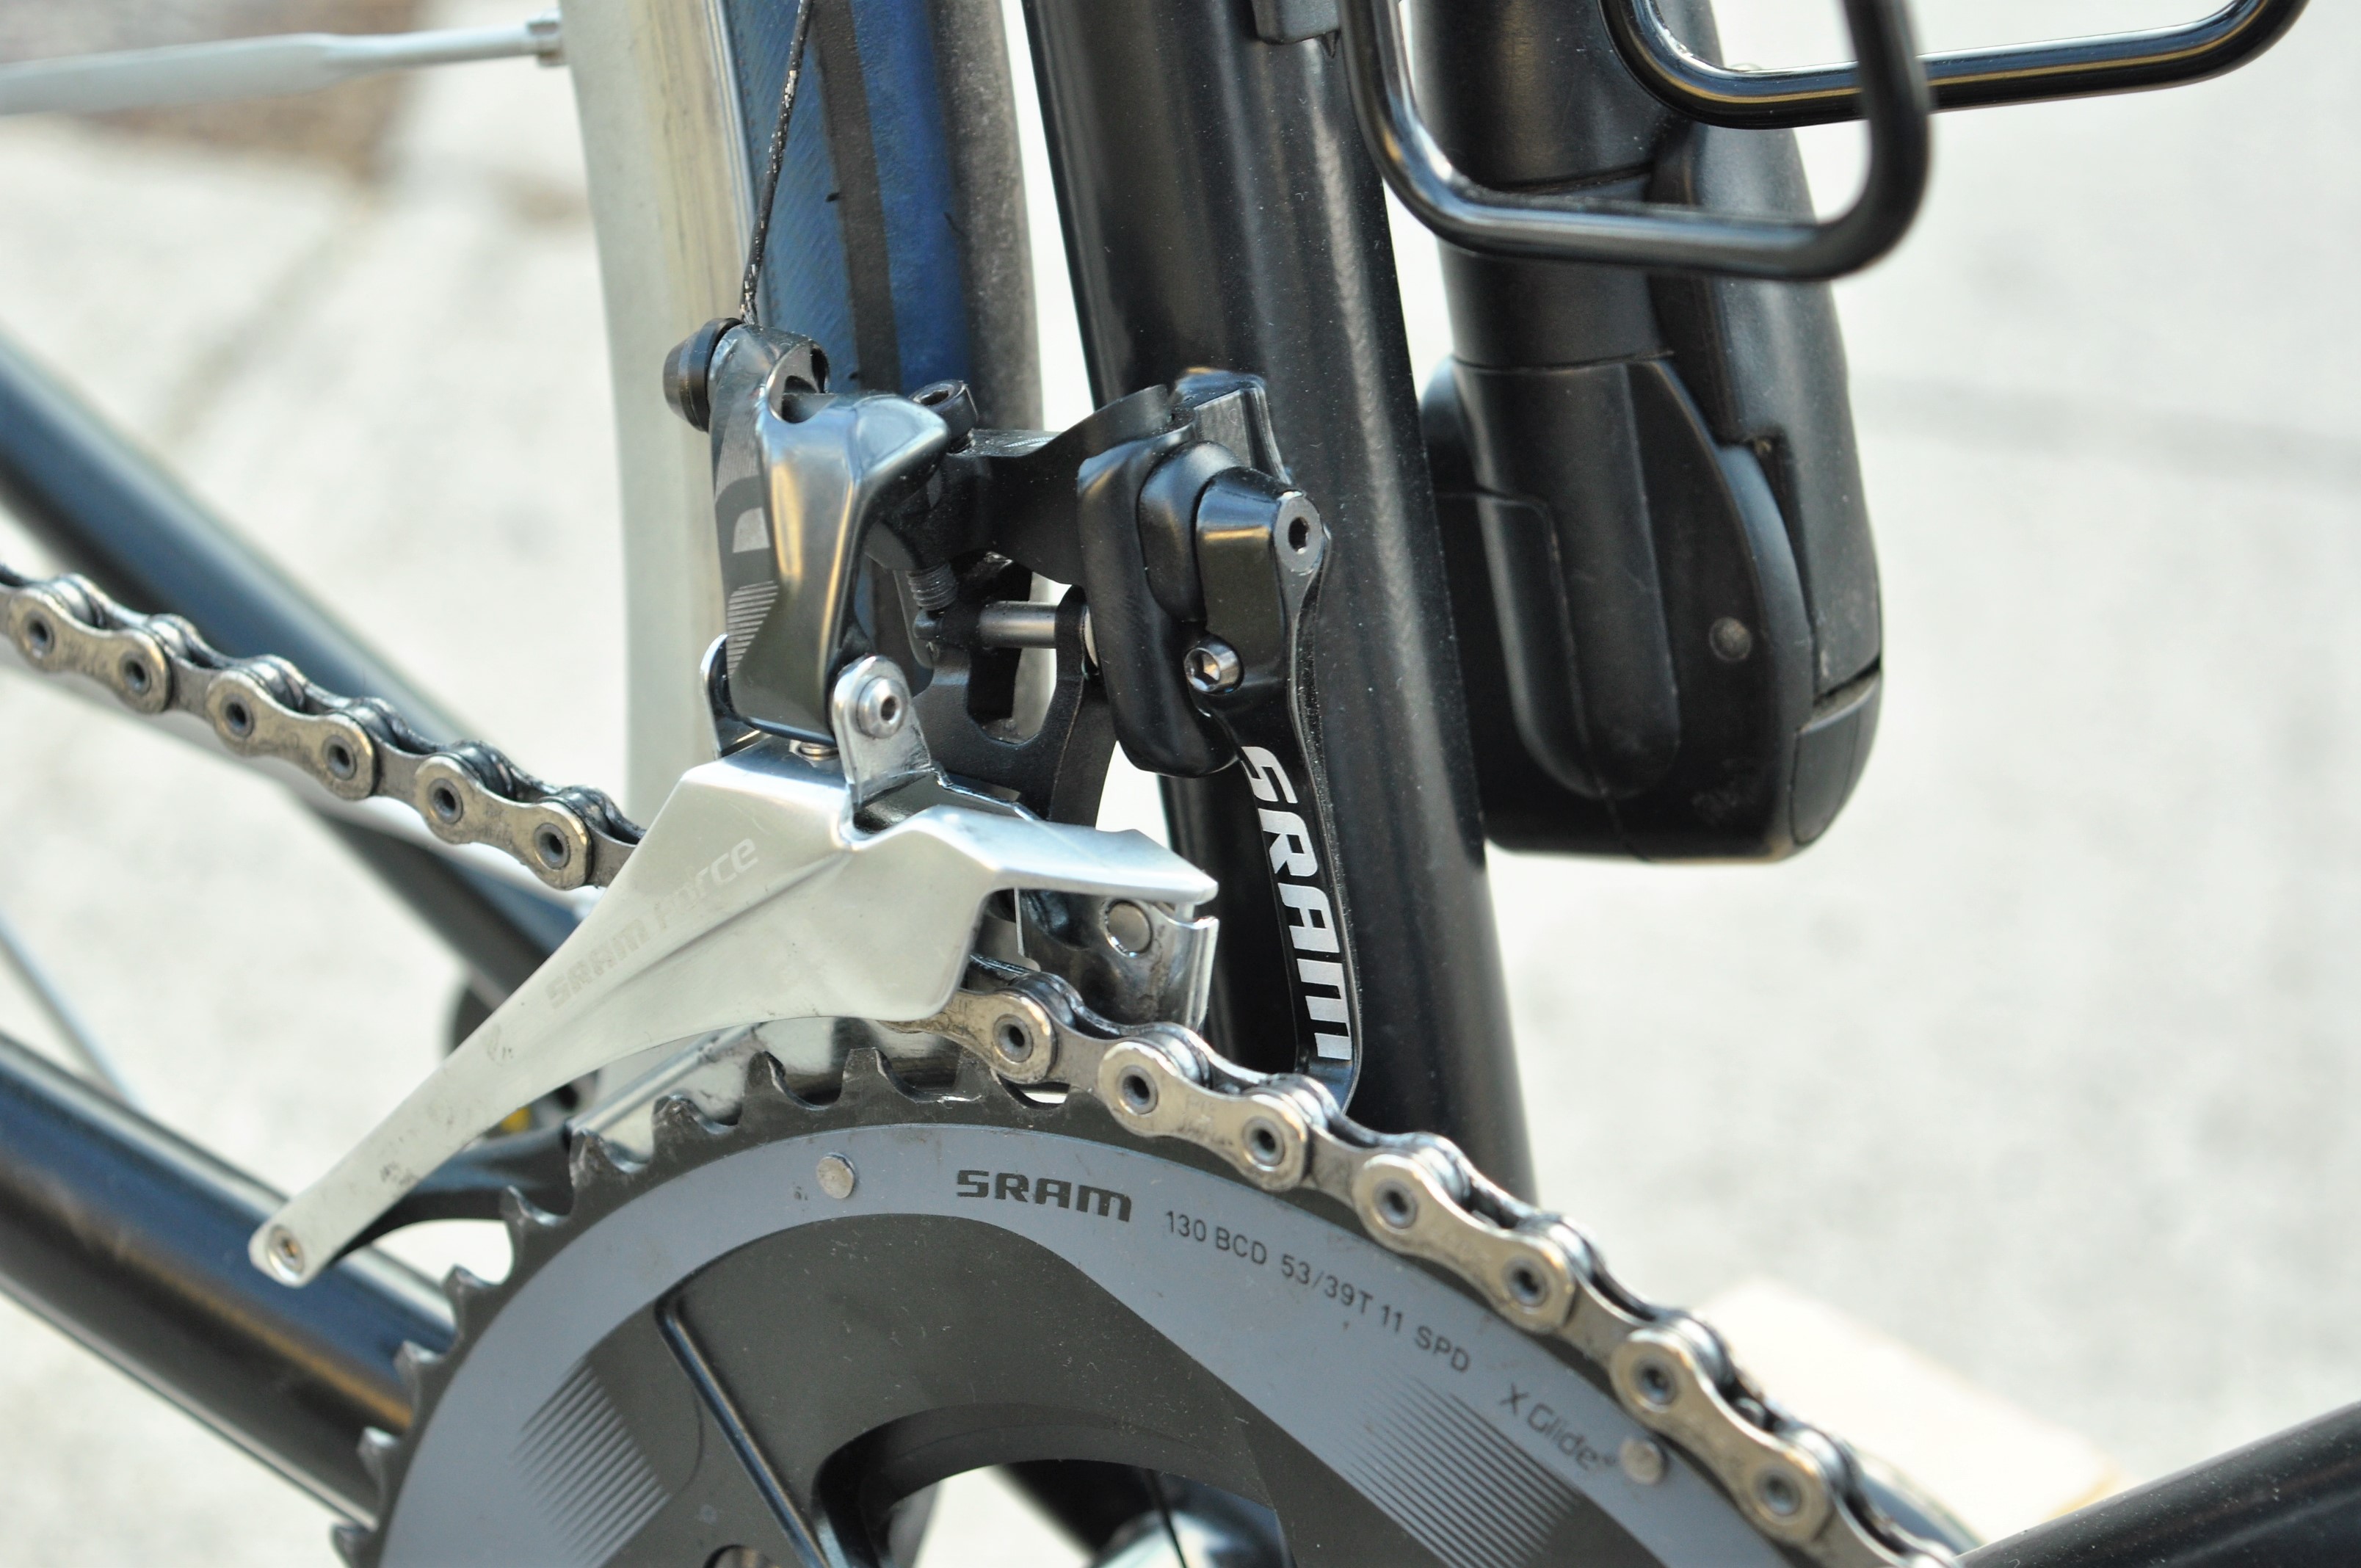
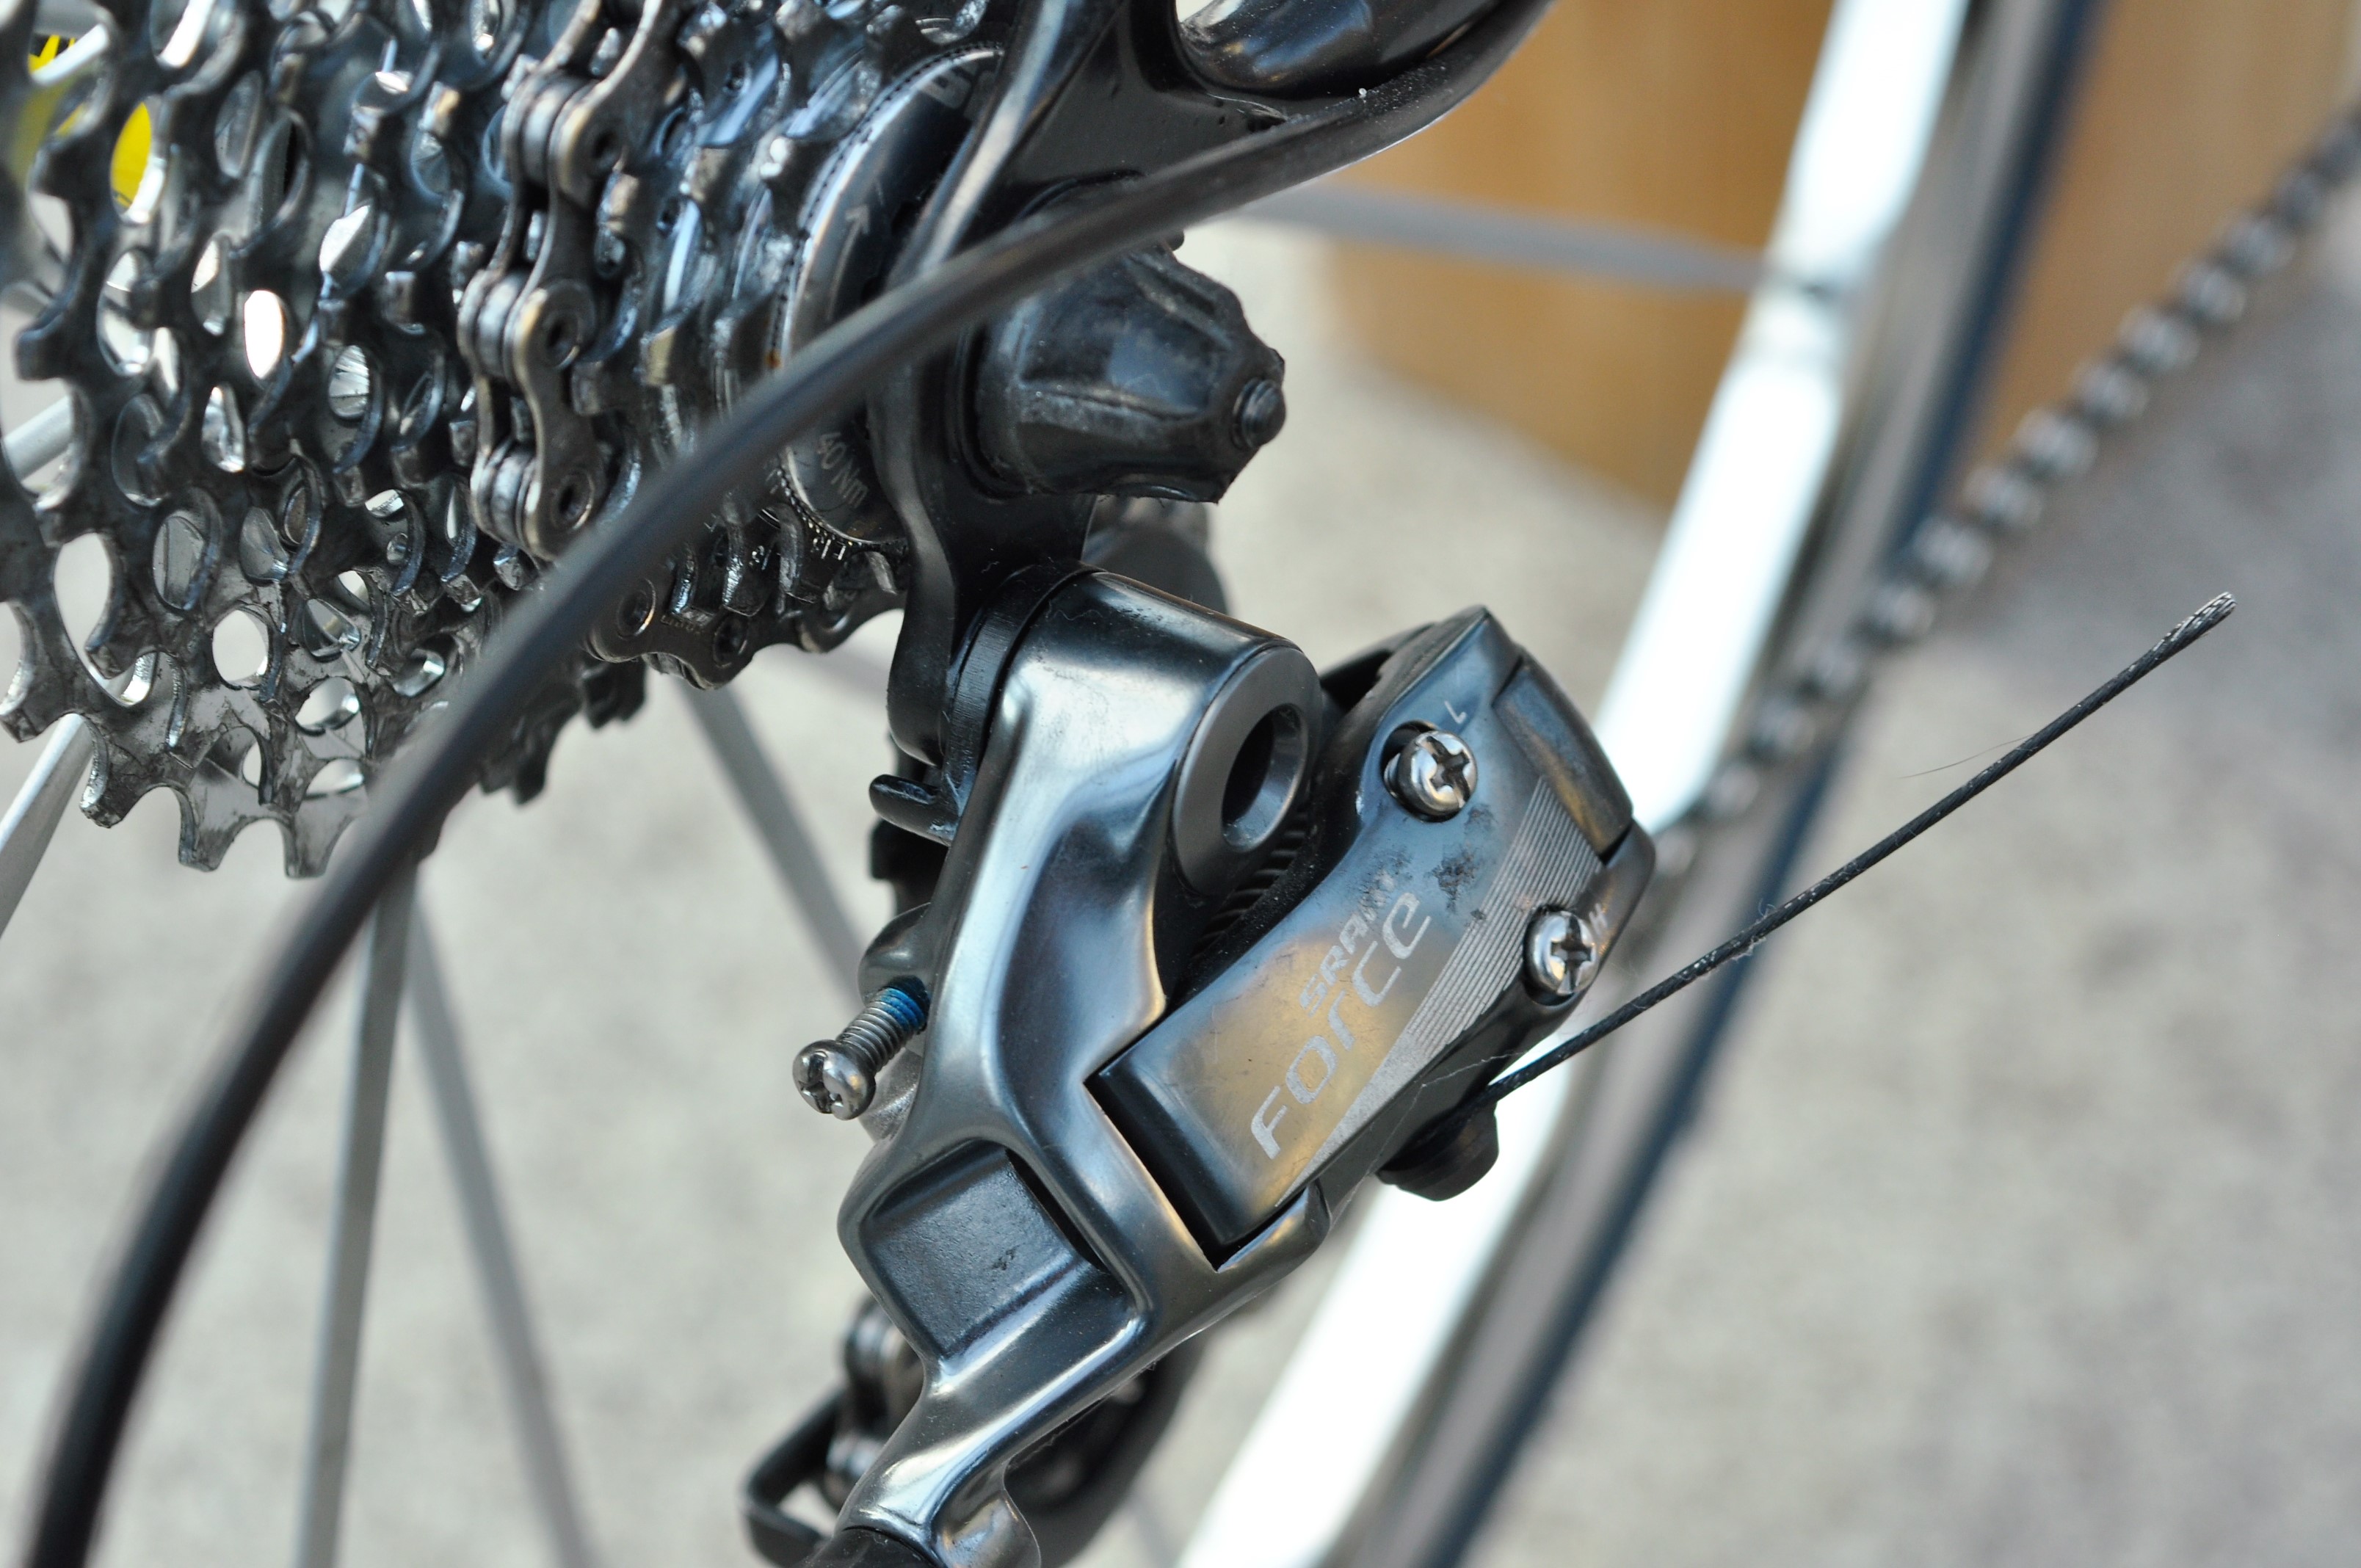
Adding the braze-ons for shifting, stopping and water bottle mounts is child’s play in comparison to what I’ve done so far, but still quite time consuming. It’s only after these things are done can I begin the final assembly of the boxes of components I’ve collected for the build over the last 4 years. That’s only a couple of days’ work at most, so I’d better get busy!
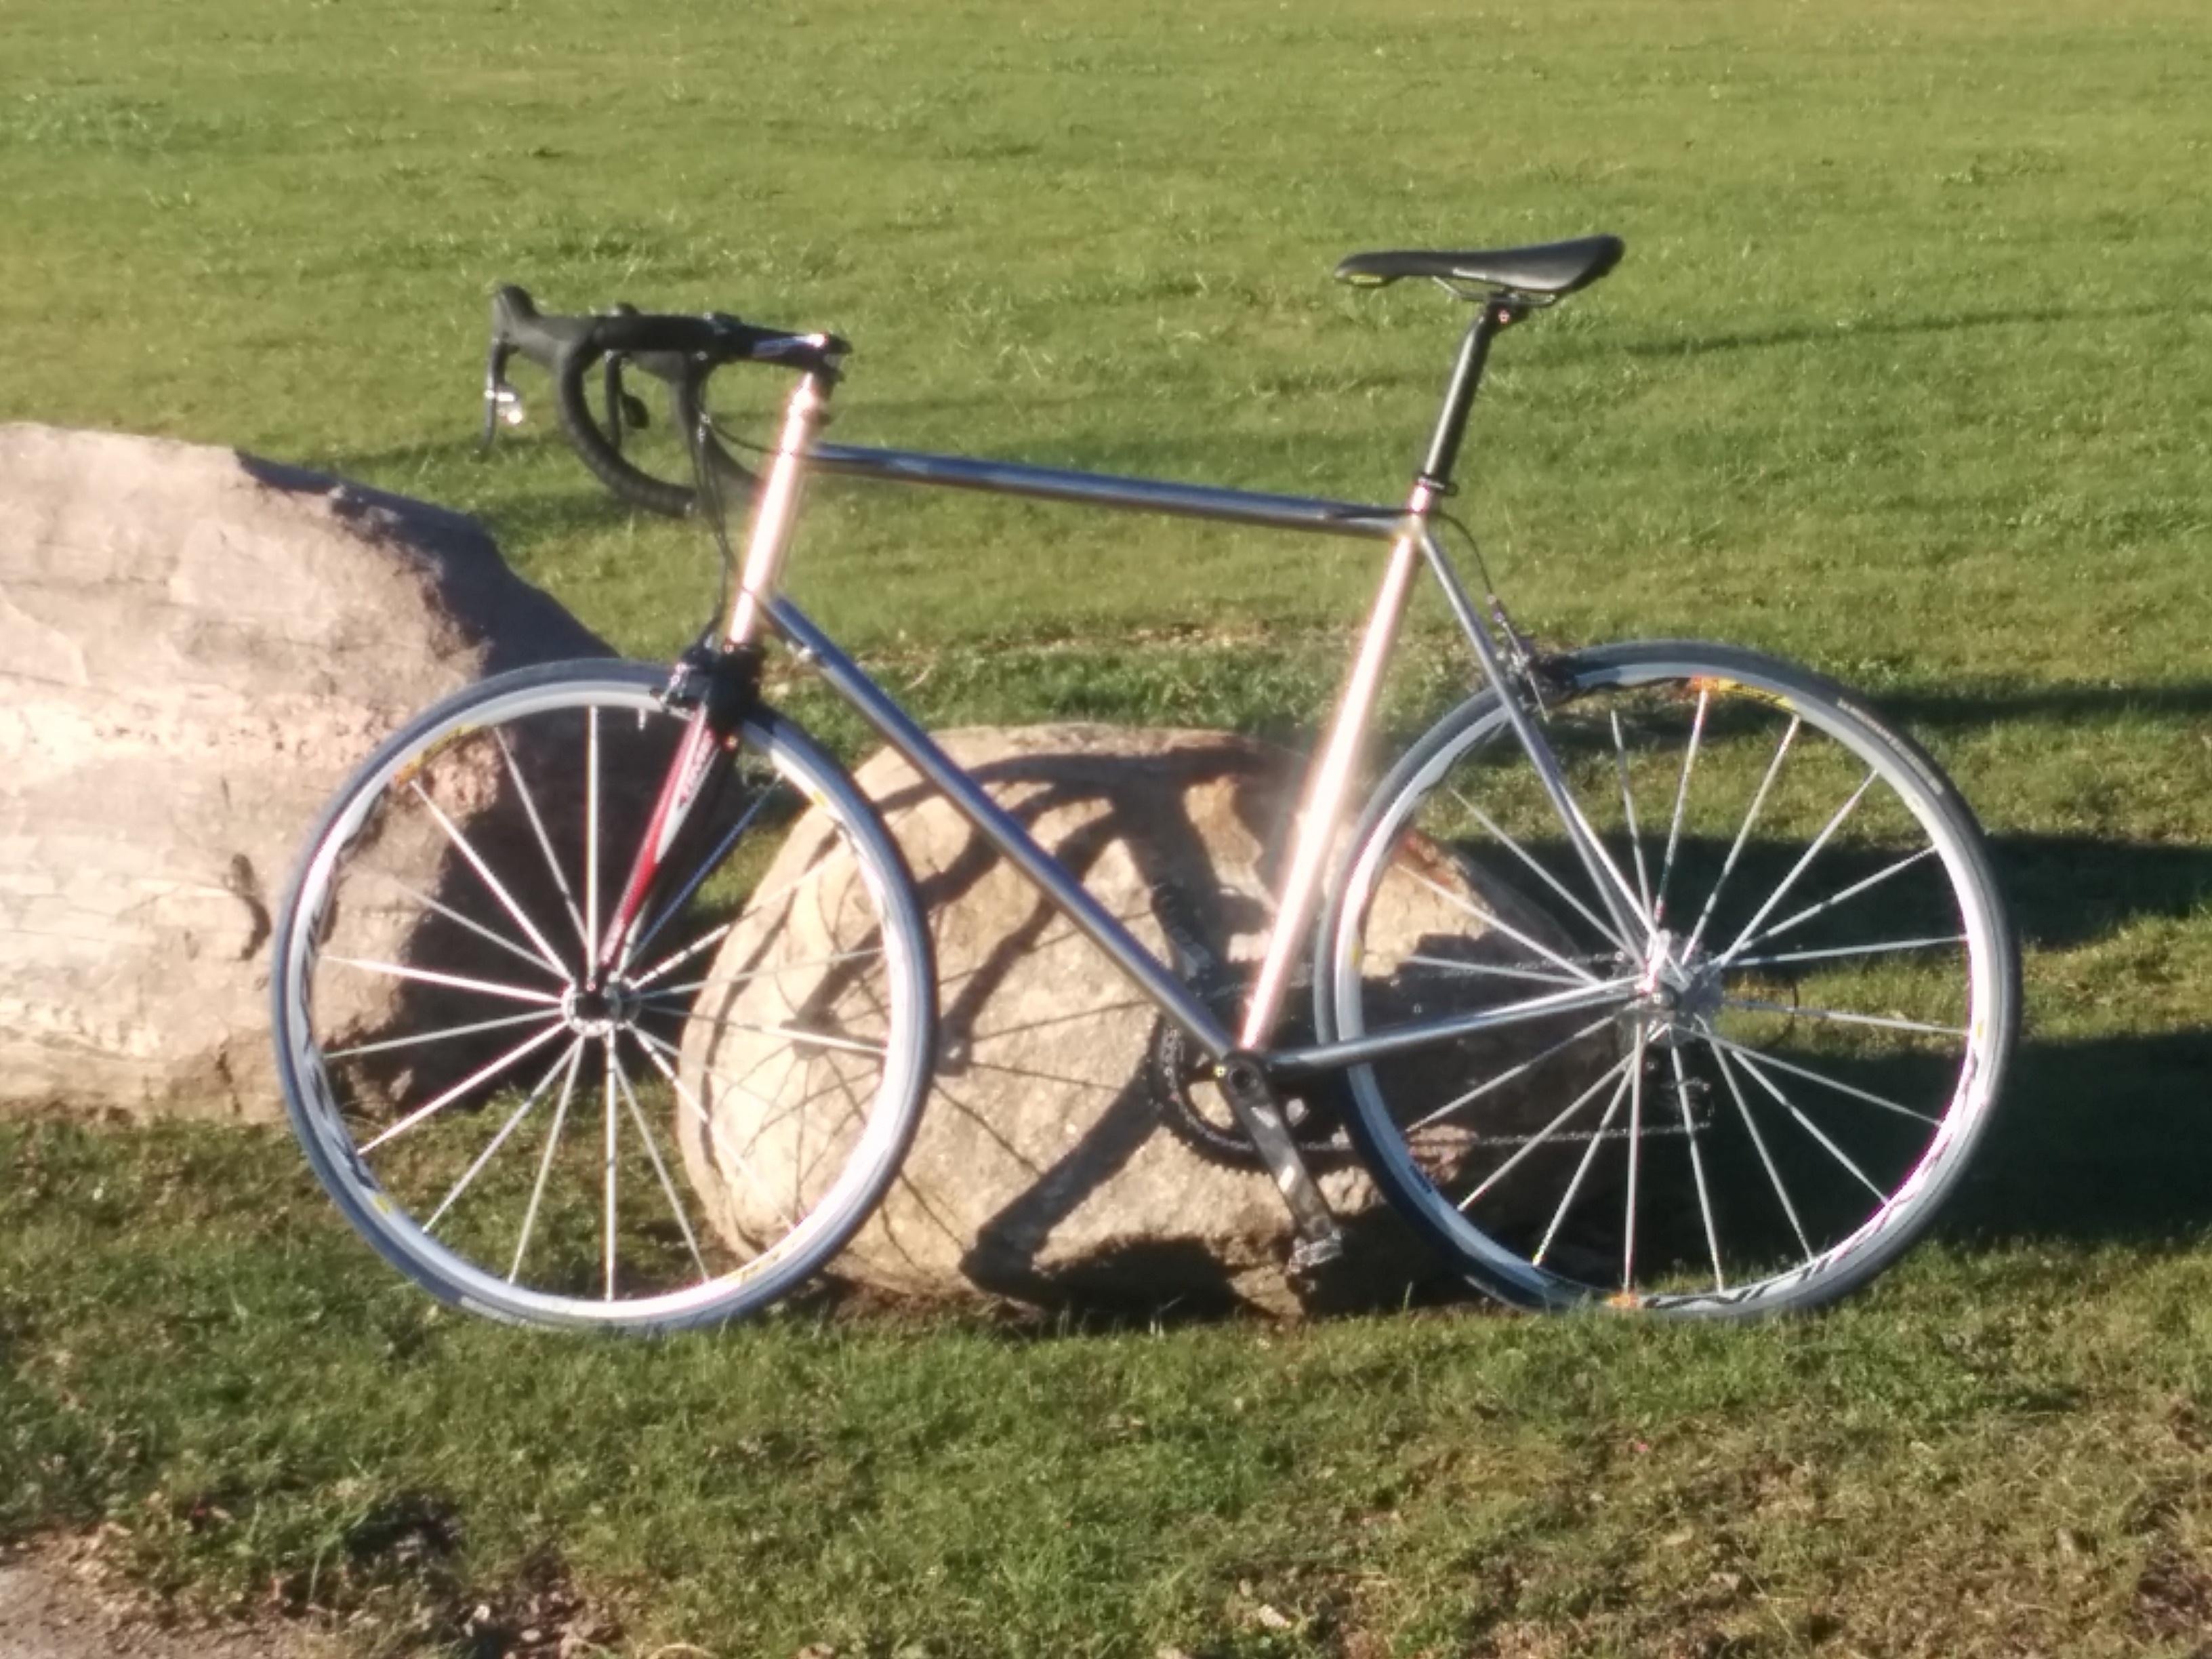
Update February 25th 2018
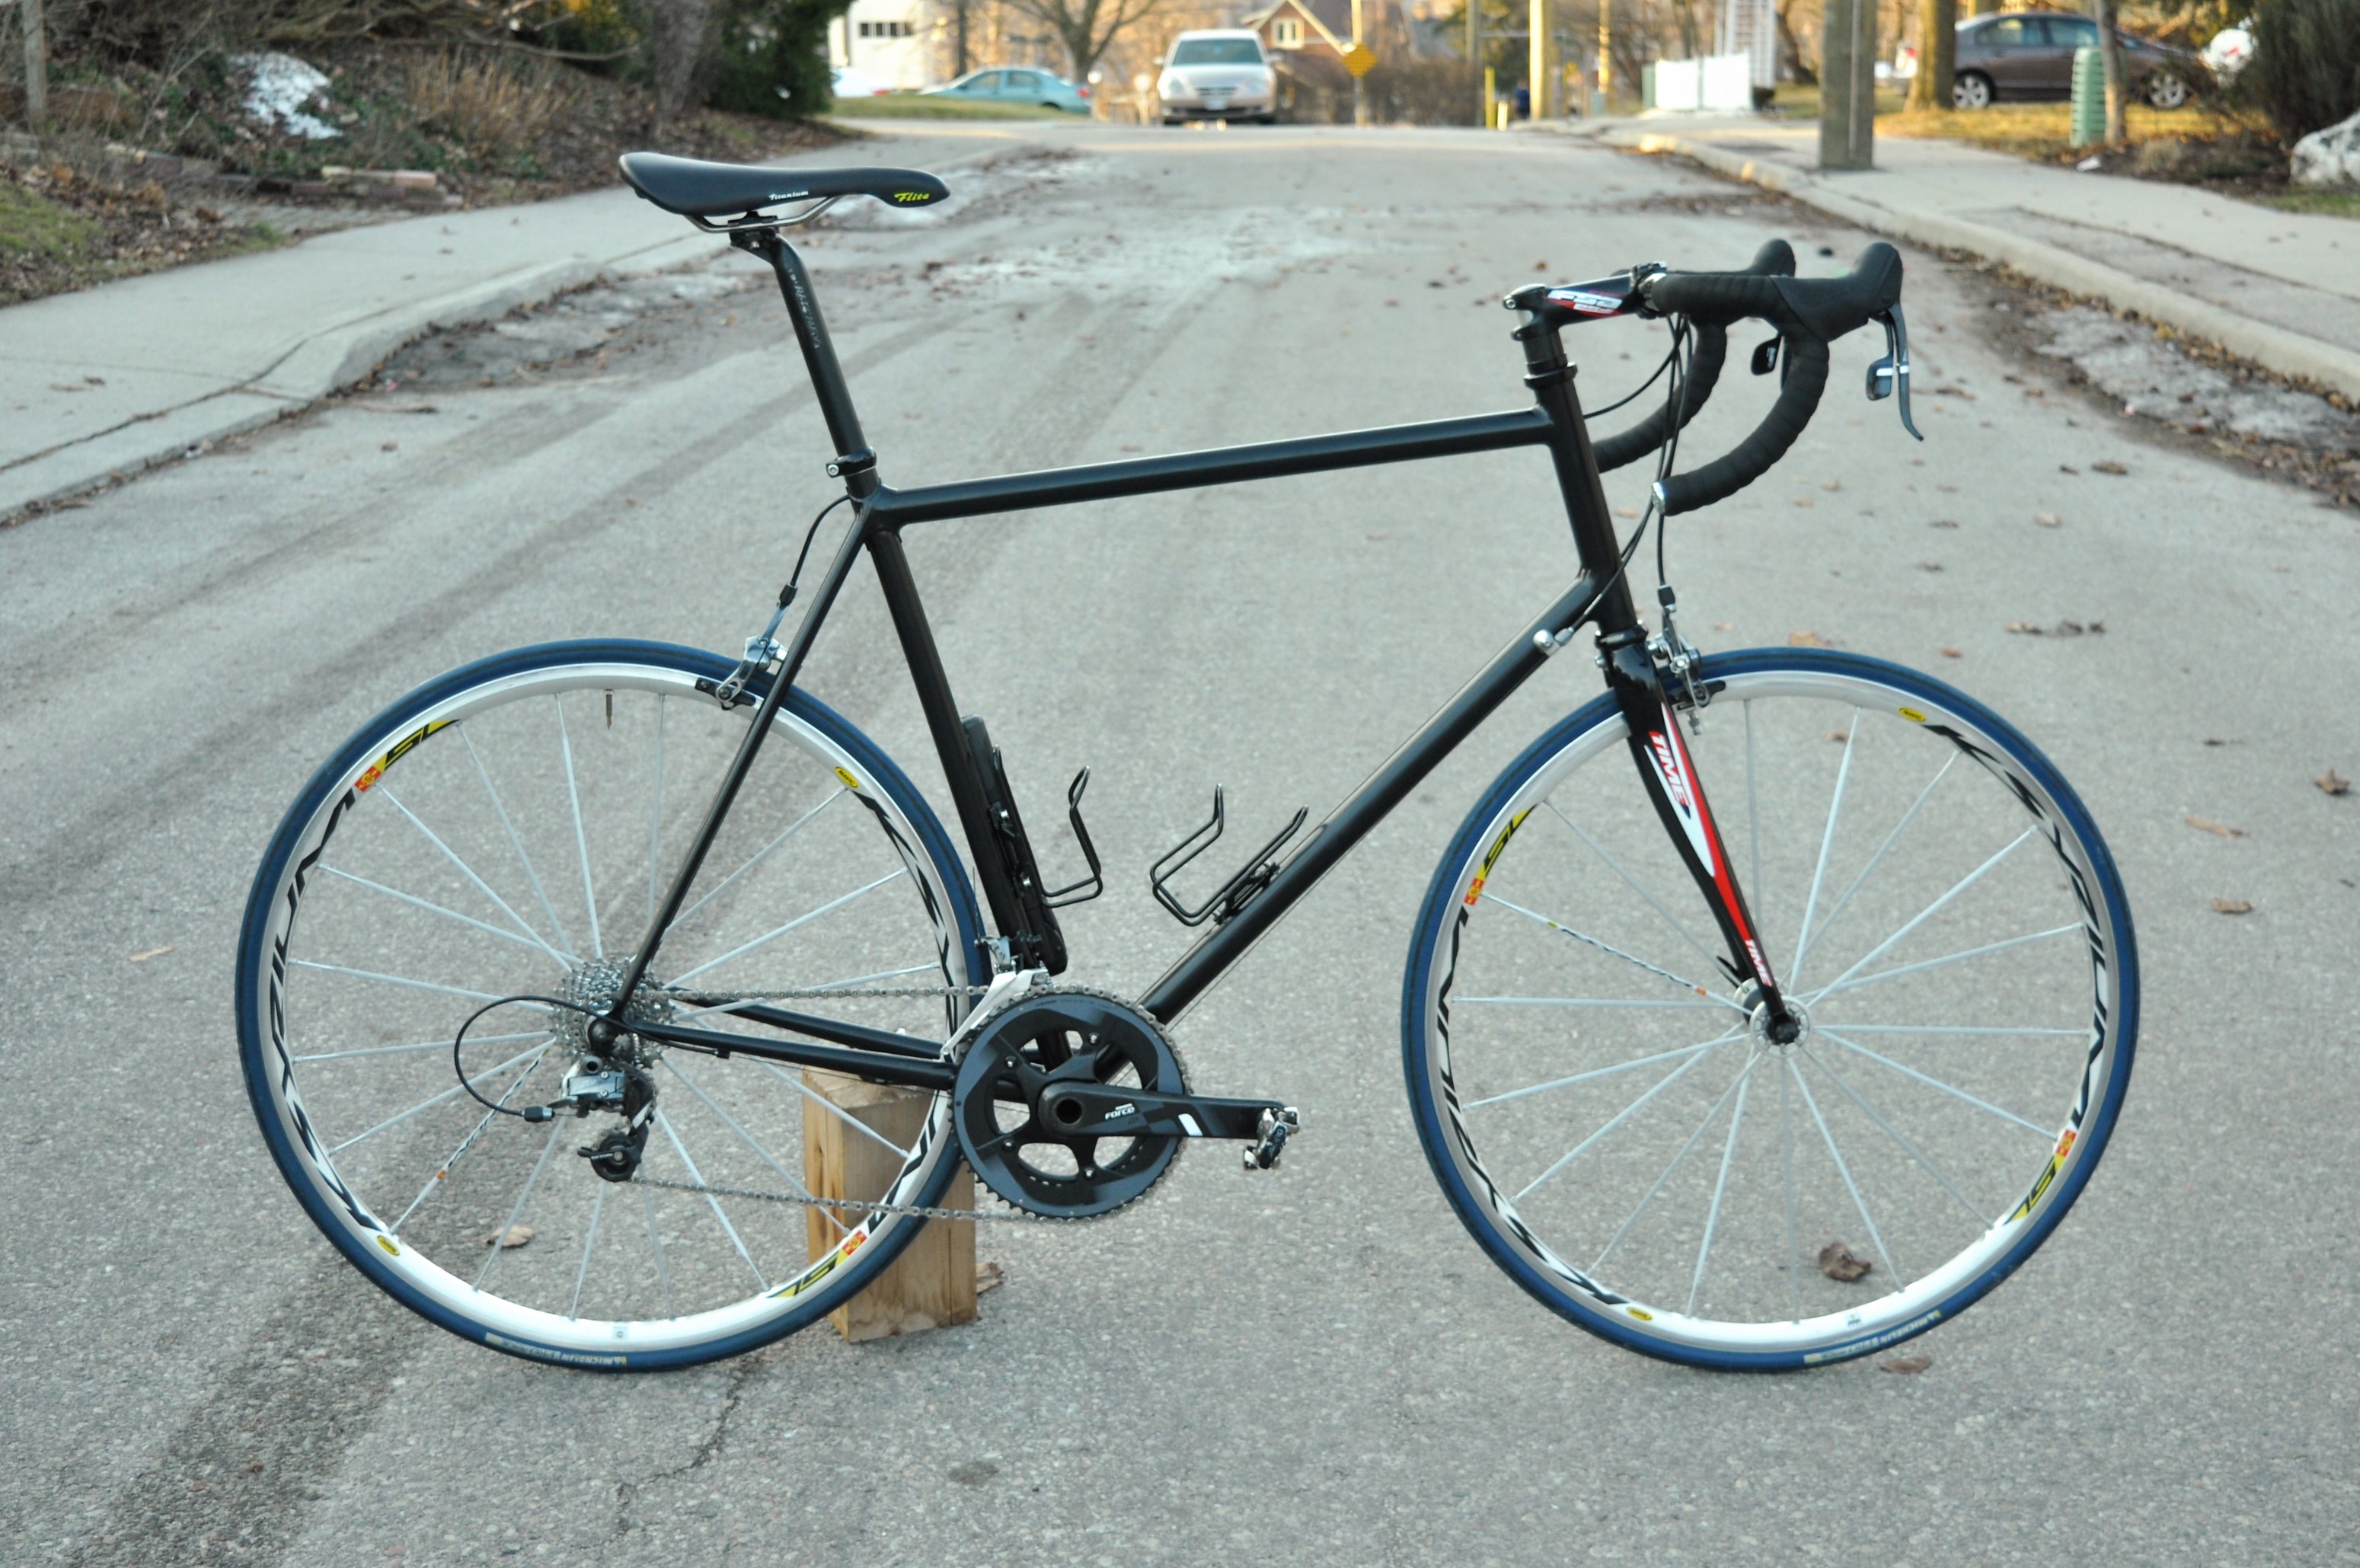
Here’s some more shots of the complete bike after powder coating.